Showing posts with label pinterest. upcycle. Show all posts

Sunday, October 21, 2012

Breastfeeding Wardrobe on a Budget (Fall 2012 Edition)

I've been wanting to make this post for awhile. Some of you may remember my previous entry on breastfeeding clothing.
Well I did something silly. When I got Pregnant with Sweetness I decided to go through my fall/winter clothing and get rid of every thing. Well ALMOST everything. lol I had a few things I loved too much to get rid of.
This month has been cold! I went to get my nursing clothing and even just fall/winter stuff out and lo and behold I had only a few pieces. Not nearly enough to get through a week let alone a whole winter.
So I did some bargain hunting. And I'm sharing my secrets again with YOU!

Some things hold true that did before. Cross over necklines are still great for easy access. LOW deep V necks are great or easy access, And you can ALWAYS wear a basic long sleeved shirt or sweater that's a bit loose over a nursing tank when you ant to feel "normal".
That said I found some cute stuff and wanted to share and give some ideas!

Hold on to your computers this is an image heavy post!
Many of the tops I have that only require a few "extras" aka the nursing bra and faux cami. (more on that in an upcoming post) Or a nursing cami underneath. 

I've purposefully picked my most obvious bra to show how well this combo works with various tops.
First category Thrifted tops!

Old Navy top purchased for 4.00 at my local thrift store. Right picture shows nursing access. 
2.00 at my local thrift store. "batwing" style top. This I usually wear with a nursing cami as the deep V neckline is a bit low for the faux cami.

4.00 at the thrift store. No pilling or wear to be seen. A nice thin top but long sleeved. I'm not sure the neckline is best for the faux cami but I've only just washed it so will have to try it around the house first. I can always add a few stitches or a snap to the bottom of the neckline to tighten it up a bit. 
I purchased this while preggers and it worked great right after birth for the prenatal belly hiding period. Now it will also work for nursing. 3/4 length sleeve. I usually only button 3 of the 6 buttons as they are tight and a pain to unbotton. less than 5.00.
 
Cowl neck top Brand ann taylor loft. Lots of room to hide a post pardum tummy. Wore while preggers and the super stretchy cowl neckline made breastfeeding so easy. 

My sister picked this out for me. I honestly am not a plaid person. And I thought I would hate it. But I was desperate after sweetness was born and couldn't go out myself due to staying inside with her for 6 weeks.
So I accepted it graciously. Turns out it is my favorite! It has SNAPS! So easy for nursing.
Not sure how much t cost but I think it was 1/2price. so probably a few dollars. 
This I purposefully purchased a size larger than I needed. It was also 4.00 and has a built in cami. But due to being larger I can simply pull it to the side and nurse through the "armpit" area. 

I think this was an areopostle brand shirt but I apparently removed the tags after giving birth as they itched me. This is one of the few I held on to during my clothing purge. I just love how thin but warm it is. I have worn it so much the middle button is trying to fall off. Need to fix that.  

This may be my favorite. It has this super pretty criss cross action going on and is so lovely! Also 4.00.

Next Category is E-bay purchases. These are shirts specifically made for breastfeeding and feature easy access openings. I have a saved search that emails me any time new breastfeeding shirts are listed. But here's my secret. I scoop up Buy it now's that are less than 10.00 with shipping, or will bid on the last day if the shipping cost plus list price is close to 12.00. So none of these cost very much either. 


Expressiva brand. 10.00 with lift away openings for nursing access. 
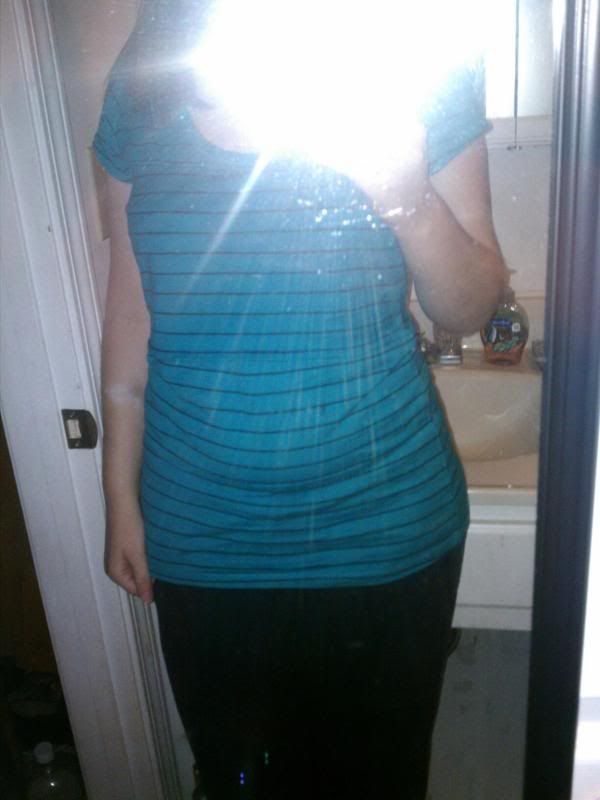
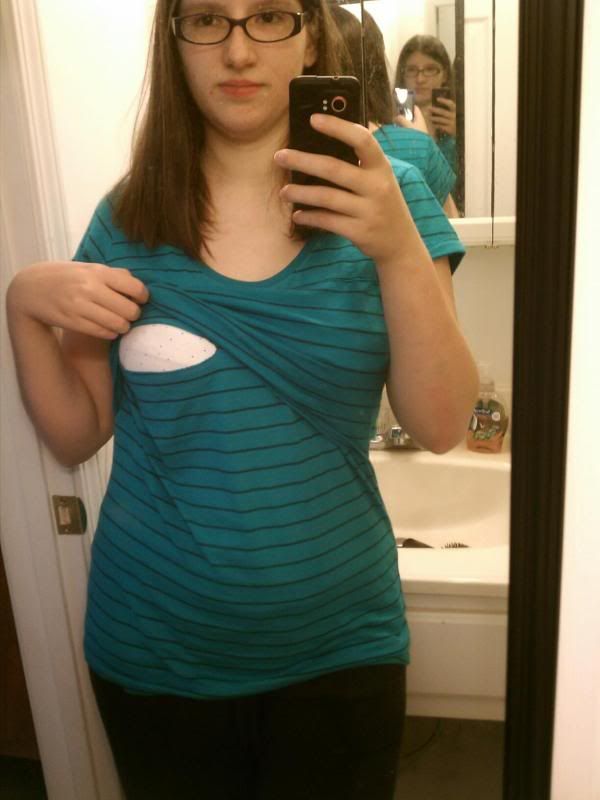
I think this is motherwear brand. Also 10.00. Has a double layer so the top striped layer lifts and there are openings in the grey under layer. This is VERY thick so will be great when it gets really cold! 

I have a third and fourth top but I think they are dirty so I can't photograph them. :(
Last are New but discounted or sale items. Some clearance. You really just have to keep your eyes open in a store. Hold the top up and stretch the necklines, pull them back, see if it's easy to nurse in that way. If it won't stretch or move to the side put it back. Unless you plan to wear over a nursing cami. Which is totally fine I just fin it a pain lately. 


Prchased at Ross, 12.00. Super stretchy charcoal grey cowl neck sweater. 
Both from walmart. End of summer clearance. elbow length sleeves, and heavier knit material. 3.00 each. I usually wear a nursing cami with these as the necklines don't like to stay put. 


Old navy clearance. 10.00 VERY sheer. Great for our wacky weather when the day starts out cold and turns into 70's with sunshine. Please forgive the wrinkles. It went right form the drier to the clothing basket. *shame on me*

Drapey cardigan. 15.00 at walmart tight now. I bought a large as I wanted it long! 

 
Dots brand 22.00. Sweater dress with nursing access. YES! I'm going to remove the little buckle decorations as they will snag in the wash. But I LOVE it! 

Blue top from dots, 19.00 but I got a discount of some sort since they where having a sale.
Skirt is a sari silk "magic" wrap skirt from enwrapture vintage that I got through a co-op. Over a nursing tank. 

Lastly Homemade tops. I wish I had more time to make these. I have so many ideas for other styles but with a toddler it's just hard to find time to make anything detailed. So here's the last one I made: 
I used two "hanes" basic t's from walmart. I think they where around 6.00 each.

As you can see Breastfeeding doesn't have to mean 80.00 shirts and dresses. You can do it with style, modesty, and affordability  I did not buy all this at once and would not recommend doing so when building any wardrobe. Stay in budget or put a few bucks up each week instead of going out to eat. It's really easy to save money.
Besides you want to spend that money on nice nursing bras that will last and give good support! 

Thursday, October 11, 2012

A crafty post


With a 13.5 month old (who is now walking) I just rarely have time to SIT and craft. lol 
But I am working on crafty things. So I thought I'd share the few things I've been able to finish lately.

My current favorite thing to make Sweetness is Legwarmers. If you are a mom you've probably heard of the brands "babylegs" and "mylittlelegs" and such. Those cute legwarmers cost around 12.00 a pair. I did find a co-op and got some for around 3.00 each but I can make them even cheaper.
Target has knee high socks for about 2.00 a pair. (at least that's how much near me) Cutting and sewing takes maybe 10 minutes total.
They fit better in my opinion than the more expensive option. I say that as they seem longer so they should fit for a longer time frame. They are also thinnner by just a bit so perfect for fall weather with cute little dresses.

The colors change out a few times a year so I can get different socks for different outfits.
Here's a few I've made so far:

 As a new born with regular socks made into legwarmers. 

  
The top two are target knee highs and the bottom pair came from the dollar store also as knee highs. They seem to be a bit smaller though and I think this is due to the cheaper materials and overhead of dollar store items.

In case you want to make some here't the tutorial I used to make them:
http://purplelizarddesign.blogspot.com/2009/09/tutorial-baby-leg-warmers.html

I just got her winter clothing wardrobe made up and I bought a few more pairs to make into more leg warmers. I can't wait to do it! I also have two really cute argyle ones read to be sewn. :) 


Now on to the practical reasons to put legwarmers on your baby. Well they make diaper changes way easier! no need to pull pants down or up. They protect those little sweet knees from carpet burn when crawling. And they can go with most any outfit and are super cute! 

Monday, July 30, 2012

Plane Travel with a Lap Riding Toddler/Baby


We are planning for a 4 week trip to CA sooner than I'd like to leave. As a result this will mean 2 seperate 6 hour plane rides (one to get there and one to get back) with a lap riding baby that can be really hard.

We struggled on the ride back last time so I needed some plans to make the ride fun for her. I did lots of reading and thinking about the trip that went well to figure out what to pack in the diaper bag.
I thought I'd post a blog about it.
Most parents ask what toys to bring. The answer is not many. Littles are more fascinated with things that AREN'T toys. So I went to the dollar store and walmart and found the following items that should pack well not take up too much room and be hits with my munchkin:

  • Sunglasses x2
  • Folding hair brush
  • Soft toy ball
  • Compact mirror
  • pocket digital calculator
  • 2 pk small slinkies
  • a few new board books and probably 3 old favorites
  • silky scarf
I am planning to make and order a few finger puppets as well as I thought that would be fun. Have some puppets to go with her favorite books and songs to make them more interesting. I bought about 7 sheets of craft felt to supplement my stash of felt scraps and plan to handsew or hotglue the puppets for the next few days.

I'm considering making her a felt quiet book but she may be too small for that so we'll see.

I will also be packing the essentials:
  • diapers
  • wipes
  • changing pad
  • Wetbag/disposable bags
  • change of clothes for Sweetness x2
  • some form of baby carrier(probably a mai tie since it fits in the diaper bag so well)
  • soft sole shoes
  • sippy cup
  • hand sanitizer
  • teething meds (we use homeopathics so easily portable)
  • Ibprophen(just in case)
  • gripe water
  • paci
  • her giraffe lionel(he's a sound machine and a must to take ANYWHERE)
  • a few know non noisy toys
  • teething razberry
  • paci straps (I make mine but this gives an idea of what they look like)
  • burp rags
  • paci wipes
  • sanitizing wipes
  • something to keep me occupied if she sleeps
Snacks:
  • granola bars for hubs and me
  • we'll purchase water at the airport
  • yogurt drops
  • veggie straws
(that's as far as I've gotten on that so far)
We purchased a backpack with GOBS of pockets (this is similar to the one I picked. However ours has a few more pockets on the front and inside)  to use for our diaper bag. It's so awesome I can't wait to get it packed and use it. :)

Most of the things I bought where cheap and under 3.00. I went to the thrift store, walmart and dollar tree. I'll be ordering the extra puppets from amazon. So excited for our trip! 

Wednesday, July 4, 2012

Super Easy Ruffle Tutorial


First I have to give credit where it is due this is NOT my idea. I got the idea from the lovely taeliac on deviant art. And had always thought "I'll try that next time."

Well I told hubby it's one of those situations where I kept putting off trying it and now that I've tried it I am kicking myself for not doing so sooner. What was I waiting for?

Anywho the time came for me to try ruffles again. I hate them. They take forever and on a knit which is what I'm using for my current project I swear they are a nightmare. You always hear "oh it's SOOooo easy!" *scoff* Yeah right. You work at them for hours only to find once they are sewn on your thread broke somewhere in the process and half your fabric is no longer ruffled. Or the thread doesn't gather no matter what you do.

Well those problems are now things of the past. Here's what you need:

Set your sewing machine to the biggest 2 step zig-zag it has. A two step zig-zag looks like this: 
See the third row of stitches? That's a 2 step. The second row is a three step and is NOT what you want. Image credit

Now place your fabric under your presserfoot, and lay your crochet thread on top. Leave a tail a few inches sticking off the edge of the fabric. Place the thread right in the center of the presserfoot.

Now simply zig zag over this thread. Do NOT sew through it. Go slowly and carefully and this should be fine. I guide the thread with my thumb as I'm sewing.
When you get to the end leave another tail of a few inches. Your stitches will look like this if you've followed my directions. 
See how the stitches end up on either side of the thread? That's what you want. Ok now insert a pin in one end of the fabric and wind your thread tails around it like so:

Then simply pull the Crochet cotton Thread on the other end and it will ruffle!

Tie your end that the pin was in once you have ruffled your desired amount. Spread your ruffles evenly and tie off the end you pulled to ruffle. Pin and place and sew on!

 Wha la! It actually took me longer to make this tutorial than make a ruffle in real  life. TRY IT! 


Next time I'll hopefully be showing you what I was working on. :) and have a new tutorial for you soon!


Tuesday, June 19, 2012

Slipcovers for kids chairs


I was given(upon my asking for it) a small kids chair for sweetness. 
The previous owners where not careful with it and it had seen better days. But I just knew sweetness would love a chair all her own.

(It looks nasty but I assure you its, just marker and dirt. Nothing icky. And it's been cleaned.)

I decided to make two slipcovers for it. That way when she'd spitup, drooled on it, or her diaper leaked,  it could be washed.
Now I've never slip covered anything before. But I refuse to let lack of experience dictate my crafty mojo. So I went through my fabric stash, and pulled out a swath of blue fleece and started at it.
I read a few blog entries on slipcovering, and I've watched enough hgtv to know if someone with barely any skills can make a slipcover for a sectional sofa then surely I could do so for a miniature chair.
I started with the seat and draped, and pinned.then hacked at the fabric with scissors.  Next the front of the arms, then the top and sides, the front if the back and last the back.
Next basting so I could remove the pins and the cover from the chair and take it to the sewing machine.


(BTW I did trim that left corner to match the right. I took the picture before that though. )
After sewing up all my basted stitches it's not bad for a first try! My next one will be a little more planned and  made from a cloth backed tablecloth so I can wipe it clean.(or hose off if need be. lol) But for now it's functional and not bad for my first try with no pattern! 
 
I can't wait for Sweetness to wake from her nap and see it! She's going to love it! 

Friday, October 21, 2011

Nursing Shirt DIY


Hopefully it goes without saying but please do not make items from this tutorial to sell online. I don't mind if you sell them in your locall area but you must give credit to me for the idea. My blog url would be acceptable. This tutorial may not be copied or sold in any manner. all the pictures and text are copyrighted to me, Bethany Hall as of October 2011.


So since having Norrie I've been breastfeeding. the benefits are great for her and me. (lower risk of breast cancer for the win!)

The only downside? Like pregnancy clothing nursing/breastfeeding tops are super expensive! I'm sorry but 40.00 and up is ridiculous and highway robbery. So I took matters into my own hands and I want to share so we can all have inexpensive but cute nursing shirts!

Materials:
2 t-shirts. One should be the size you wear and one should be slightly bigger. I used two juniors OP "elbow sleeve" shirts from wal*mart. The bottom main shirt is a large and the one I cut up is an xl.
Wash and dry them. That finish in the shirts is awful and makes the finished product less stretchy.
  • A washable fabric marker(felt tipped works best)
  • Ruler or tape measure
  • Pins
  • Scissors
  • (not pictured) Thread in the main color on your shirt. I used white.

Measure down from the center front of your neckline about 3 inches and mark. Also mark between your breasts. I marked about an inch and a half centered between the two.
Mark about 1.5 inches from the side seam on each side. 
cut the from one of the lines between the breasts, to the line near the side seam.
You should have this. Repeat on other side.

Mark about 8.5 inches from the bottom hem of your extra shirt. I used a pin for this. You can use less but I had a striped shirt and wanted them to line up as much as possible.

 Cut up the side seams and then across the area with the pin.
This is where you should be at.
Now start pinning at the top. I line the raw long edge of the panel up with the wide stripe just below the neckline. For a non striped shirt you will start just below the neckline. Make sure to turn the raw edge under just a bit as you pin. 

Here's the shirt with the top edge pinned.
repeat on the sides.

In the case of knit shirts I'd say more pins are better. It helps prevent the fabric from slipping and stretching to much during sewing. 
Make sure you have a full or nearly full bobbin. This way it won't run out while you are sewing.

 You want ball point sewing needles. Use the orange band. Ball points won't tear the knit fabric. 
Your stitches per inch should be around 8.

Set your stitch to a nice big zig-zag.
 
Tension should be fairly tight.
Now we can start sewing! 
 Hold your top thread tight for your first few stitches. This makes sure the machine is sewing at even tension. Also don't pull your fabric as you sew. If you do this with a knit it will stretch and warp. Let the machine pull the fabric through on it's own. Just guide it with your hands.
Start sewing at the bottom of one of the sides, work up the side, across the top, then down the other side. 
 To turn a corner stop with the needle in the down position.


Lift the presser foot. The lever on the back of my machine is up to lift the presser foot.

Turn the fabric, and put the presser foot back down.
Lever down and so is the presserfoot. Sew the rest of the fabric.

Pull a few inches of thread out.

And cut in the middle.

Stitches on the shirt. :)
Remove your pins.
Now you will have two threads on the outside of the shirt. one on each side of the side seams. Thread one through a needle.

And push through to the back layer.

Remove the needle.

Some people simply cut the threads but I've had projects fall apart when this is the case. SOOO Tie them in a knot.

Then clip close to the knot. Repeat on the other side. 
Remember the holes you cut in the bottom shirt? Now we're going to finish the edges, technically you don't have to but it will prevent them from stretching out too much. Feel free to stop at this step.
Just make sure to wash your shirt before you iron it. If you iron it the marker marks won't come out. Wash it first. :)
Start sewing. Make sure to have one of the steps of the stitches go on the fabric, and one on the opening.

Hopefully you can see what I mean in these pictures.

Make sure to turn your corner and then come down the opposite side of the hole. 

Pull out a fe inches of thread and cut.

You will have two threads on the outside and two on the inside.
I couldn't get a good shot of this but tie the two on the inside in a knot and cut close to the knot, and repeat with the two on the outside.
Follow he same procedure for the opposite opening.
And you're done!


And you're done! Nursing bras are ugly maybe one day I'll tackle those...
The best part about this shirt is you can make it with long or short sleeves. And for very cheap! The two shirts I used for this tutorial cost about 5.00 each. Same for the blue one in the bottom pictures.
To Nurse simple unclip the nursing bra, and lift up the front flap. The openings should be right across the breast with the nipple fairly close to the middle.
Easy peasy!