Showing posts with label Crafts. Show all posts

Friday, October 10, 2014

Top Stitching a Diaper and Sewing Elastics

In the cloth diaper sewing group I'm in on facebook, we were asked how we all do our elastics. I seem to be in the minority who sews elastics in when they do top stitching. She asked if I could take pictures and I decided to make a little tutorial on how I did it.
It would be easier to show you in a video but we seem to have lost the charger to the digital camera I use for that. And since I don't have a way to mount my cell phone to my head hopefully this will do.

First note my diaper is turned right side out and waiting on elastics. This is a pocket so will have back elastic and leg elastic on both sides.

 
mark your elastics per your pattern. I use a washable crayon. 

 
Pin your back elastic on the marks. I leave about 1/4 inch extra beyond the pins.  This is it without any other pins all bunched up.

 
Stretched out.  Now with the diaper stretched use your fingers to move the elastic up against your seam allowance. And place a pin directly underneath. repeat across till the pin hold the elastic in place. Check to make sure you aren't pinning the elastic by accident.

 
I lifted the pocket opening to try to show you how this looks inside. It's hard to see but the elastic is not pinned to the diaper but is held in place by the pins if that makes sense. 

 
All pinned in place.

 
Repeat the pinning at the elastic caking marks for the leg. 

 
I use my knees and hold one wing with them, then use one hand to stretch the diaper out and the other to place my pins. you're doing the same thing where you push the elastic into the seam allowance, and pin just below it. 

 
Here's the leg all pinned and ready to sew. 

 
You can sort of see that the pins are not right against the edge. You'll be sewing in the area of fabric on your pins. 

 
One leg done. 

 
Repeat on other side and you are ready to sew. 


Ok so I start at the back elastic tacking mark and sew down, reverse, then back down tacking it in place. 

 
Pivot and sew across the pinned area. I'm bad and sew over my pins, but you can definitely remove them as you sew just make sure to pull your fabric taught so the elastic stays where it is pinned and to sew slowly.
Sew across the area of fabric my finger is pointing to.


Showing the stitching so you can see where I'm talking about sewing. 

 
Go back up the next tack mark, forward, then back again, turn and pivot the diaper and carry on top stitching ...

 
around the wings and to your leg elastic.  

 
Turn your diaper again and tack your elastic down. I sew in reverse once then back forward. 

 
Pivot back and sew along your pin area again. 


I was trying to get a good photo of my needle plate so you could see where I'm sewing. I think that's the 6/8th mark. 

 
Diaper slightly stretched so you can see the finished leg. I forgot to take a photo of the other end of the leg elastic. But it's the same process. So you just pivot and tack the elastic down then continue top stitching around the front of the diaper. 

 
Other side has been reached. So I tack the elastic down, reverse, and forward, then follow the same process of sewing on the pinned area. around the 6/8th mark.

 
Reached the last elastic marking. tack down, reverse,

 
and go forward, then continue top stitching... 

 
Till you reach your starting point with the elastic tack mark on the back of the diaper.  Finish your threads how you like and clip them, now all that's left is your snaps or velcro on the wings and you are set.


Hope that makes sense!

Wednesday, October 9, 2013

Testing a popular Pinterest tutorial: Sharpies on ceramic

I've been itching to do some crafty things lately but between potty breaks, cleaning (I'm really trying to get my house in order as it is something I struggle with), Bible study and such I haven't had much time.
I saw this popular project and wanted to try it. But I could only do so if the finished item was dishwasher safe. Which some said it was and others said it wasn't.
So I bought this little ramekin to use as a guinea pig bowl for our little girls veggies. I drew her name on one side:
And a likeness of her on the other:
 I put it in the dishwasher on a regular wash cycle and ran it overnight. Then waited till the next morning to take it out to compare. 
Then took it out. This is what her likeness looked like: 
There are a few areas where the silver sharpie wore off on her rump. And it looks like it took the brown with it on her nose.  
Her name however was perfect. Exactly how I had drawn it. So It seems to me perhaps certain colors would hold up better than others. These where standard colored sharpies and the silver metallic one. I will be interested to see how this continues to hold up in the dishwasher. I'll make sure to post after awhile to let you know how it lasts! 

Thursday, October 11, 2012

A crafty post


With a 13.5 month old (who is now walking) I just rarely have time to SIT and craft. lol 
But I am working on crafty things. So I thought I'd share the few things I've been able to finish lately.

My current favorite thing to make Sweetness is Legwarmers. If you are a mom you've probably heard of the brands "babylegs" and "mylittlelegs" and such. Those cute legwarmers cost around 12.00 a pair. I did find a co-op and got some for around 3.00 each but I can make them even cheaper.
Target has knee high socks for about 2.00 a pair. (at least that's how much near me) Cutting and sewing takes maybe 10 minutes total.
They fit better in my opinion than the more expensive option. I say that as they seem longer so they should fit for a longer time frame. They are also thinnner by just a bit so perfect for fall weather with cute little dresses.

The colors change out a few times a year so I can get different socks for different outfits.
Here's a few I've made so far:

 As a new born with regular socks made into legwarmers. 

  
The top two are target knee highs and the bottom pair came from the dollar store also as knee highs. They seem to be a bit smaller though and I think this is due to the cheaper materials and overhead of dollar store items.

In case you want to make some here't the tutorial I used to make them:
http://purplelizarddesign.blogspot.com/2009/09/tutorial-baby-leg-warmers.html

I just got her winter clothing wardrobe made up and I bought a few more pairs to make into more leg warmers. I can't wait to do it! I also have two really cute argyle ones read to be sewn. :) 


Now on to the practical reasons to put legwarmers on your baby. Well they make diaper changes way easier! no need to pull pants down or up. They protect those little sweet knees from carpet burn when crawling. And they can go with most any outfit and are super cute! 

Monday, July 30, 2012

Plane Travel with a Lap Riding Toddler/Baby


We are planning for a 4 week trip to CA sooner than I'd like to leave. As a result this will mean 2 seperate 6 hour plane rides (one to get there and one to get back) with a lap riding baby that can be really hard.

We struggled on the ride back last time so I needed some plans to make the ride fun for her. I did lots of reading and thinking about the trip that went well to figure out what to pack in the diaper bag.
I thought I'd post a blog about it.
Most parents ask what toys to bring. The answer is not many. Littles are more fascinated with things that AREN'T toys. So I went to the dollar store and walmart and found the following items that should pack well not take up too much room and be hits with my munchkin:

  • Sunglasses x2
  • Folding hair brush
  • Soft toy ball
  • Compact mirror
  • pocket digital calculator
  • 2 pk small slinkies
  • a few new board books and probably 3 old favorites
  • silky scarf
I am planning to make and order a few finger puppets as well as I thought that would be fun. Have some puppets to go with her favorite books and songs to make them more interesting. I bought about 7 sheets of craft felt to supplement my stash of felt scraps and plan to handsew or hotglue the puppets for the next few days.

I'm considering making her a felt quiet book but she may be too small for that so we'll see.

I will also be packing the essentials:
  • diapers
  • wipes
  • changing pad
  • Wetbag/disposable bags
  • change of clothes for Sweetness x2
  • some form of baby carrier(probably a mai tie since it fits in the diaper bag so well)
  • soft sole shoes
  • sippy cup
  • hand sanitizer
  • teething meds (we use homeopathics so easily portable)
  • Ibprophen(just in case)
  • gripe water
  • paci
  • her giraffe lionel(he's a sound machine and a must to take ANYWHERE)
  • a few know non noisy toys
  • teething razberry
  • paci straps (I make mine but this gives an idea of what they look like)
  • burp rags
  • paci wipes
  • sanitizing wipes
  • something to keep me occupied if she sleeps
Snacks:
  • granola bars for hubs and me
  • we'll purchase water at the airport
  • yogurt drops
  • veggie straws
(that's as far as I've gotten on that so far)
We purchased a backpack with GOBS of pockets (this is similar to the one I picked. However ours has a few more pockets on the front and inside)  to use for our diaper bag. It's so awesome I can't wait to get it packed and use it. :)

Most of the things I bought where cheap and under 3.00. I went to the thrift store, walmart and dollar tree. I'll be ordering the extra puppets from amazon. So excited for our trip! 

Monday, July 16, 2012

Little sewing tip!


If you like me are constantly loosing your chalk and happen to always have a random nub of soap, to small to wash things with but too big to toss I have the perfect solution. Use that soap nub to mark your fabrics!
It marks darker really well and washes right out!


Tuesday, June 19, 2012

Slipcovers for kids chairs


I was given(upon my asking for it) a small kids chair for sweetness. 
The previous owners where not careful with it and it had seen better days. But I just knew sweetness would love a chair all her own.

(It looks nasty but I assure you its, just marker and dirt. Nothing icky. And it's been cleaned.)

I decided to make two slipcovers for it. That way when she'd spitup, drooled on it, or her diaper leaked,  it could be washed.
Now I've never slip covered anything before. But I refuse to let lack of experience dictate my crafty mojo. So I went through my fabric stash, and pulled out a swath of blue fleece and started at it.
I read a few blog entries on slipcovering, and I've watched enough hgtv to know if someone with barely any skills can make a slipcover for a sectional sofa then surely I could do so for a miniature chair.
I started with the seat and draped, and pinned.then hacked at the fabric with scissors.  Next the front of the arms, then the top and sides, the front if the back and last the back.
Next basting so I could remove the pins and the cover from the chair and take it to the sewing machine.


(BTW I did trim that left corner to match the right. I took the picture before that though. )
After sewing up all my basted stitches it's not bad for a first try! My next one will be a little more planned and  made from a cloth backed tablecloth so I can wipe it clean.(or hose off if need be. lol) But for now it's functional and not bad for my first try with no pattern! 
 
I can't wait for Sweetness to wake from her nap and see it! She's going to love it! 

Tuesday, January 29, 2008

Lilly Pad Pin Cushion Pattern


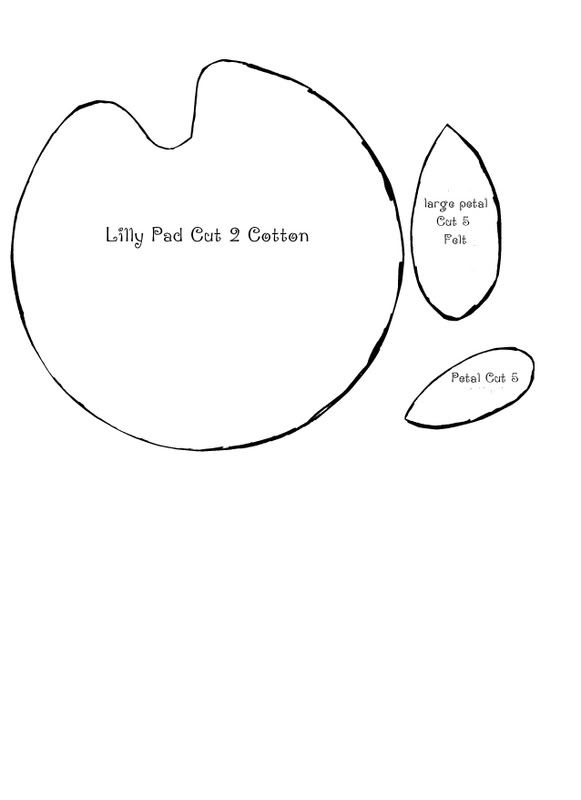
Ok you need two of the pin cushion piece and 5 each of the petals.
I used my machine and sewed the pin cushion the same way we've done the round ones. Leaving a small space to turn. I don't think it's good to use the space between the bumps to turn as it's rounded and harder to stitch up. So use any where else on the piece.
For the petals I slightly overlapped and pinned all the large pieces to each other and used a straight stitch on my machine to sew them to each other.
Then I made two long straight rows of stitches along the bottom a 1/8 of an inch or so apart.
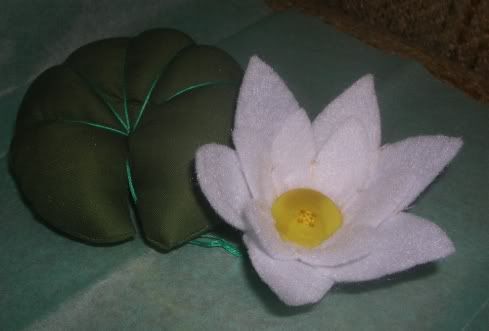
I used these to gather the petals and make that nice cup like shape.
Then I stitched the last two petals that were not attached to each other to form a little petal tube type thing.
I did the same thing with the smaller petals. Then layered them inside each other using a button in the middle.
I did the same thing that whip-up does with her pin cushion for the veins on the large part. But Instead of in the center I was about an inch or so from the little dip in the piece. Then I fastened my thread off and instead of cutting just stitched it to the bottom of my flower.
Wha-La! Pin cushion!
If you have any questions feel free to ask.

Saturday, January 26, 2008


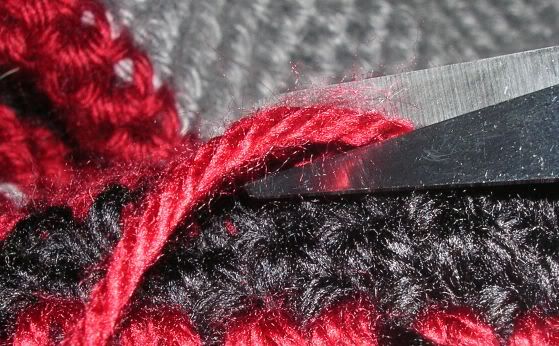
After all the frustration I keep seeing with ends and having them come out I've been working on this tutorial for awhile. I am posting it both on Craftster and my blog jsut to make sure it doesn't disappear. :)
Sorry it took so long the project I meant to use as the entire example was not working out and had to be frogged. So anyways here it is finally!

How to Crochet over Ends:
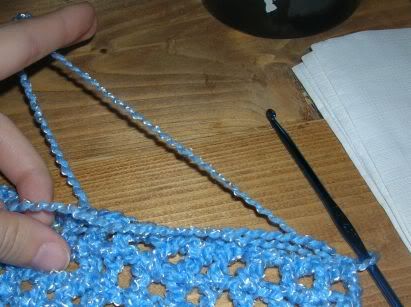
1.) First lay the two ends next to each other on top of your work. I crochet right handed so simply reverse the direction if you are left handed.


2.) Pick up the new yarn with your hook as if you were going to make your next stitch normally.


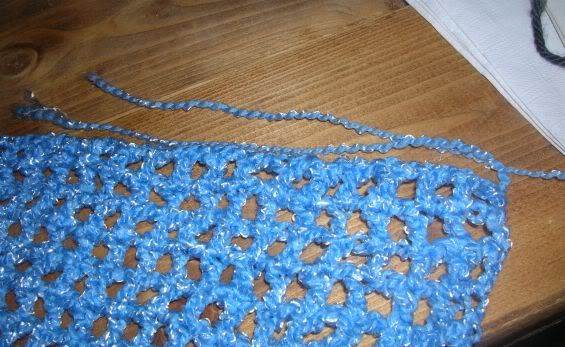
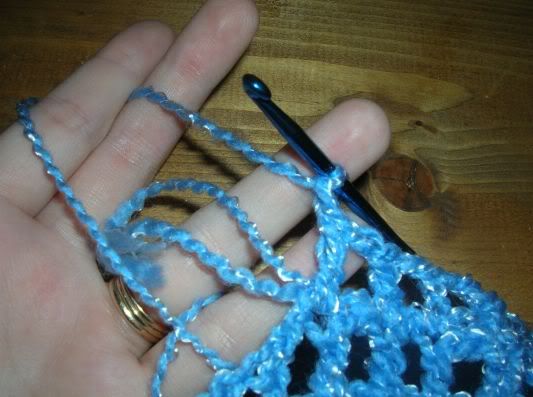
3.) Here you can see the working yarn in between my fingers at the top of the picture and the old ends on the bottom:


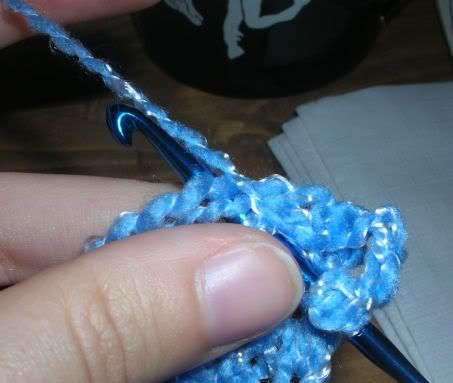
4.) Insert your hook into the top of the next stitch your ends should be on top of the previous row of stitches. (I'm doing a double crochet)


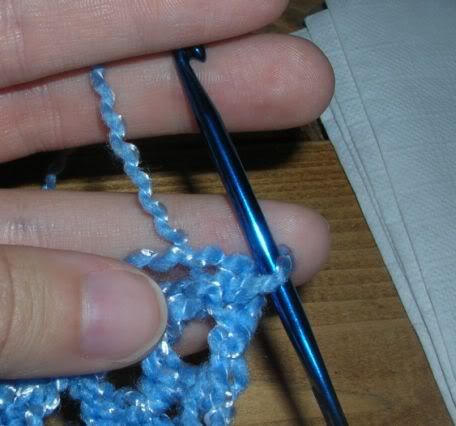
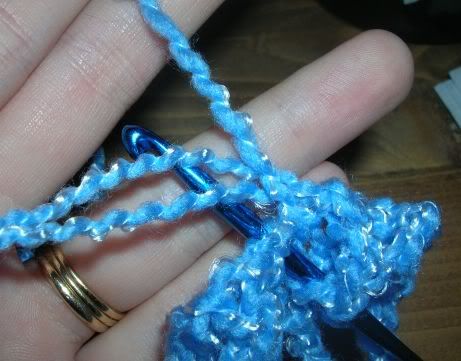
5.) Here's the same step from another angle:


I'm holding the working yarn in my first and second fingers and the ends with my thumb against my palm.


6.) Complete your stitch as if the ends are the top of the stitch you crocheted into instead of seperate. (i'm not sure if this makes sense or not.)


7.) Repeat steps 4-6 for a few stitches I typically do about 3 or 4. Next ignore the tails and crochet normally. You may have to move them out of the way.
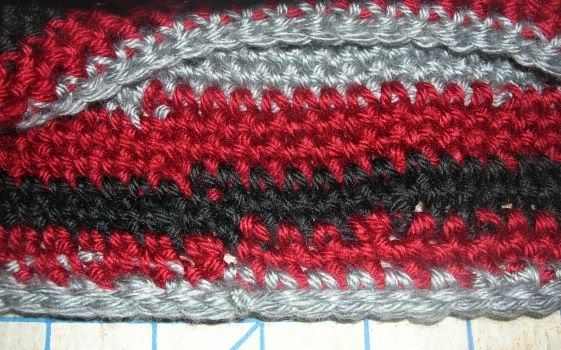
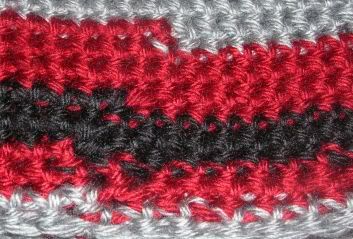
Front of row:


Back of row:


Give your ends a light tug to pull them tight. Then clip close to stitch.

If you don't feel this is enough security (like myself) then proceed to next tutorial...
Weaving in Ends:
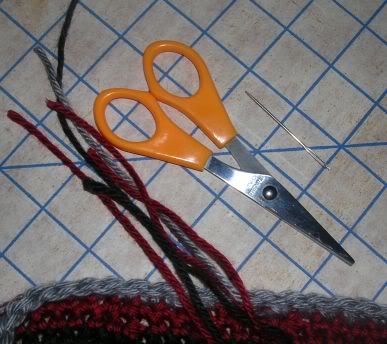
1.) Supplies:
  • Large eye needle,
  • Ends to weave in,
  • And scissors


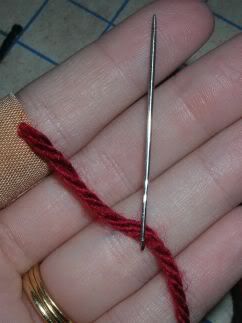
2.) Thread end through needle:


3.) 
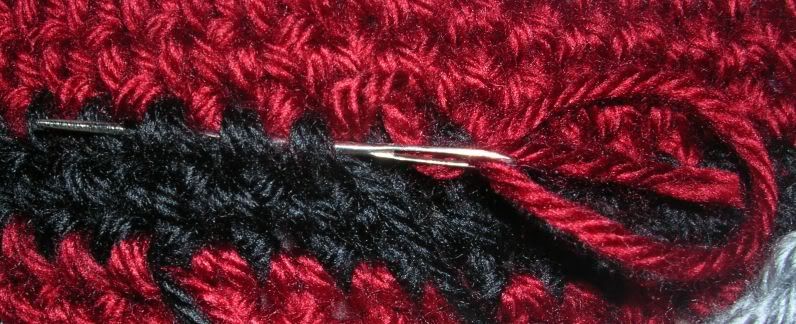
Insert the needle under the "v's" (stitches). I usually go under about 3-5 stitches. (I'm working from left to right.)


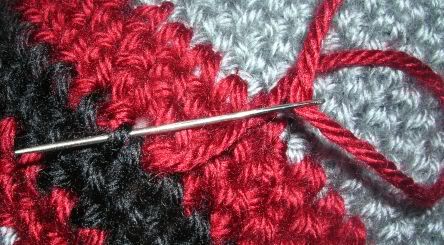
4.) You will see the end coming out of one stitch to the right of the needle. you are now going to weave back the opposite direction. Examine your stitches for a minute. Your stitches form little "V's". Think of each side of the V as a leg of the stitch. Now skip the first leg of the next stitch, on the left side. You should see that this is the stitch right next to your end. Insert your hook under the next leg.


5.)
 Weave under the next 3-4 stitches in the opposite direction.


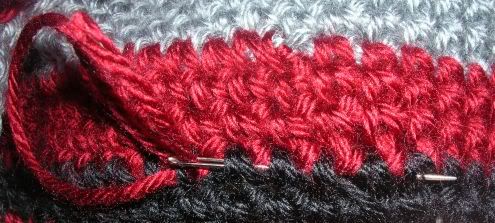
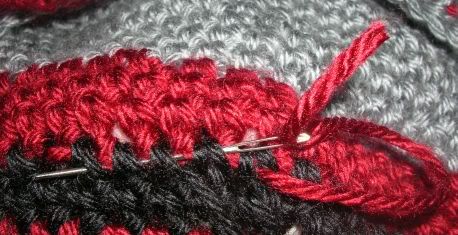
6.) Repeat steps 4- 5 once more:


Clip ends close to stitches:


Stretch the crocheted piece just a bit.
back:


Front: