Showing posts with label Tips and Tricks. Show all posts

Sunday, April 16, 2017

THM My Journey Begins, The Guide pt 1

I Started a new eating plan in the beginning of January and Have been waiting to post till I could really talk about it.

It's called Trim Healthy Mama and is taking the internet by storm. It's faith based and real food based. And honestly I love it!

There's a bit of a learning curve and I have a few friends who want to join me on the adventure so I thought I'd share the tips and Tricks, as well as favorite products, that helped me get started and moving on it.

Some background, I come from the SAD(standard american diet) but had slowly been transitioning to more real foods over the years since having Sweetness. We've had some seasons in life where I was back on that pretty much entirely and the mom guilt has set it. I Always wanted to be the mom who makes all her kids lunches from scratch and puts together healthy snacks, packs lunches instead of fast food, and doesn't really touch processed foods unless really necessary. And with this plan I can be that mom!

I received the books for Christmas. My thoughts were this is overwhelming and I can't do it! But I found this handy cheat from pinterest that helped me get my feet wet:
http://www.gwens-nest.com/trim-healthy-mama-book-review/
This page has a downloadable "quick start" guide which tells you what chapters to read to get started along with some handy tips.

Next since I mostly shop at aldi i perused some pins on what to buy there:
http://laslimfemme.com/what-does-a-trim-healthy-mama-buy-at-aldi/
http://darciesdishes.blogspot.com/2015/12/trim-healthy-mama-aldi-shopping-list.html

The main things I buy where on there with just a few additions like stevia and nut milks. Which brings me to this list:
http://workingathomeschool.com/2015/08/12/starting-trim-healthy-mama-for-only-8
Which for those of us on a tight budget was super helpful.

So then I implimented the plan like this:

  • first few days I printed the lists of S and E meals and taped them to my fridge.
  • First week I ate as normal but compared my meals to my lists to see which category they belonged in. This helped me figure out how to redo my meals so they worked in the THM world.
  • I did a week of S meals only for my first week "on plan", as recommended on many pages and facebook groups. I found these printable lists super helpful to keep on my fridge and refer back to over and over:

https://s-media-cache-ak0.pinimg.com/564x/26/e0/7f/26e07f23d67daed668660af4d07043e8.jpg
https://s-media-cache-ak0.pinimg.com/564x/b6/46/a2/b646a2cbbc933136f7134a705b911f96.jpg

  • The next week I decided to stick with my real plan of breakfast, lunch, and snacks/desserts. And went forward. I found several yummy things between the cookbook, pinterest and the HUGE group on facebook.

Armed with my list and a few recipes I wanted to try I went forward. I shopped. And I meal planned.
My first meal plan wasn't fancy but I knew if I wanted to make this work I'd need lots of sweets the first few weeks or I would feel deprived. This eating plan is sugar free, high protein, and low carb. It's so yummy. But let me tell you the no sugar thing wasn't easy.  So I wasn't afraid to experiment and try new things. As well as throw many a failed attempt away or pour down the drain! lol

I discovered I love Good Girl "Moonshine" which isn't moonshine at all but has a bite to it which I liked. And there are many variation recipes on pinterest. Remember REAL GGMS will have ginger and apple Cider vinegar though!


  • I spent a LOT of time in the kitchen the first month. I stayed up late a lot after all else in the home went to bed and prepped ahead and baked. I finally got into a rhythm as my first month came to an end.


The one thing I kept reading over and over again was to make the plan work for you. So I decided since I am blessed with a husband who loves to cook, And eat out to fellowship with friends and family, That my "make it work" would be to do the plan for all my snacks/desserts, and breakfast and lunch. If we ate out I'd get what was on plan or close to it. If he cooked I'd eat what was on plan and not stress about the rest.

The scale didn't move the first month AT ALL. In fact when I did weight myself I had gained 2 lbs! I was frustrated to say the least. But I remembered to measure myself and when I did I was shocked! I'd dropped 2 inches in my bust, and hips, and 1.5 inches in my stomach at the widest part! The next month the scale finally moved and I'd lost 4 lbs. This may not seem worth it to some but let me tell you this is NOT meant to be a fast weight loss diet. It is meant to be slow and safe for your body, and easy to maintain once you finally get to goal weight. For those of us with less to loose this takes longer. So 4 lbs in 2 months is wonderful! And even more so for not being 100% on plan.


First when you have a sweet craving, make a GGMS or peanut whip. I don't know why those two thing helped so much but they did.

I didn't buy much extra stuff. I splurged on a few flour alternatives, (almond and coconut) and bought nut milk(cashew and almond as I wasn't sure which I'd prefer. Cashew is my favorite).stevia in packets from aldi,and a few dairy products like 1% cottage cheese, Fat free greek yogurt, 000 oiko's drinkable yogurt was on sale so I grabbed a few of those and lots of cheese!

And with that I went on my way! I'll make another post with my favorite recipe links soon. and part two of this info. My hubby has gone on plan with me too and that has changed up a few things. as have my kids eating habits and such because I don't buy a lot of the junk I used to anymore.

I've also saved my menu's and such so if anyone is interested in that I'll gladly post those too. Till next time!

Friday, November 22, 2013

Apple Cider in the Coffee Maker

It's been nearly a MONTH since I posted last. So I thought I'd do a quick one with a new "life hack" I've discovered. Perhaps this is not news to anyone else but It was to me so I wanted to share.


Backstory:

We no longer have a microwave. I accidentally nuked the 'wave for 20minutes with nothing in it and it fried. So we decided to go without one and see what happens. I really only used it for two things anyway and both were easily remedied.

Then Fall happened. In the south our winters aren't super cold but they are windy and wet. And this year has been no exception. I saw R.W. Knudson's Cider& Spice, No sugar added, 100% juice and knew it would be fabulous.
But then, wait, no microwave to heat it in! And I don't own a tea kettle(I know that is definitely going on my "to buy" list now)!!!!
So I had to come up with some easy way to warm just a little up at a time.


And since necessity is the mother of invention....

How to Warm Cider in a Coffee Maker

I'm trying to get with the times. Pinable images. ;)
First Pour your desired amount of cider into your carafe.
 Next remove the basket where your coffee filter/grounds goes.
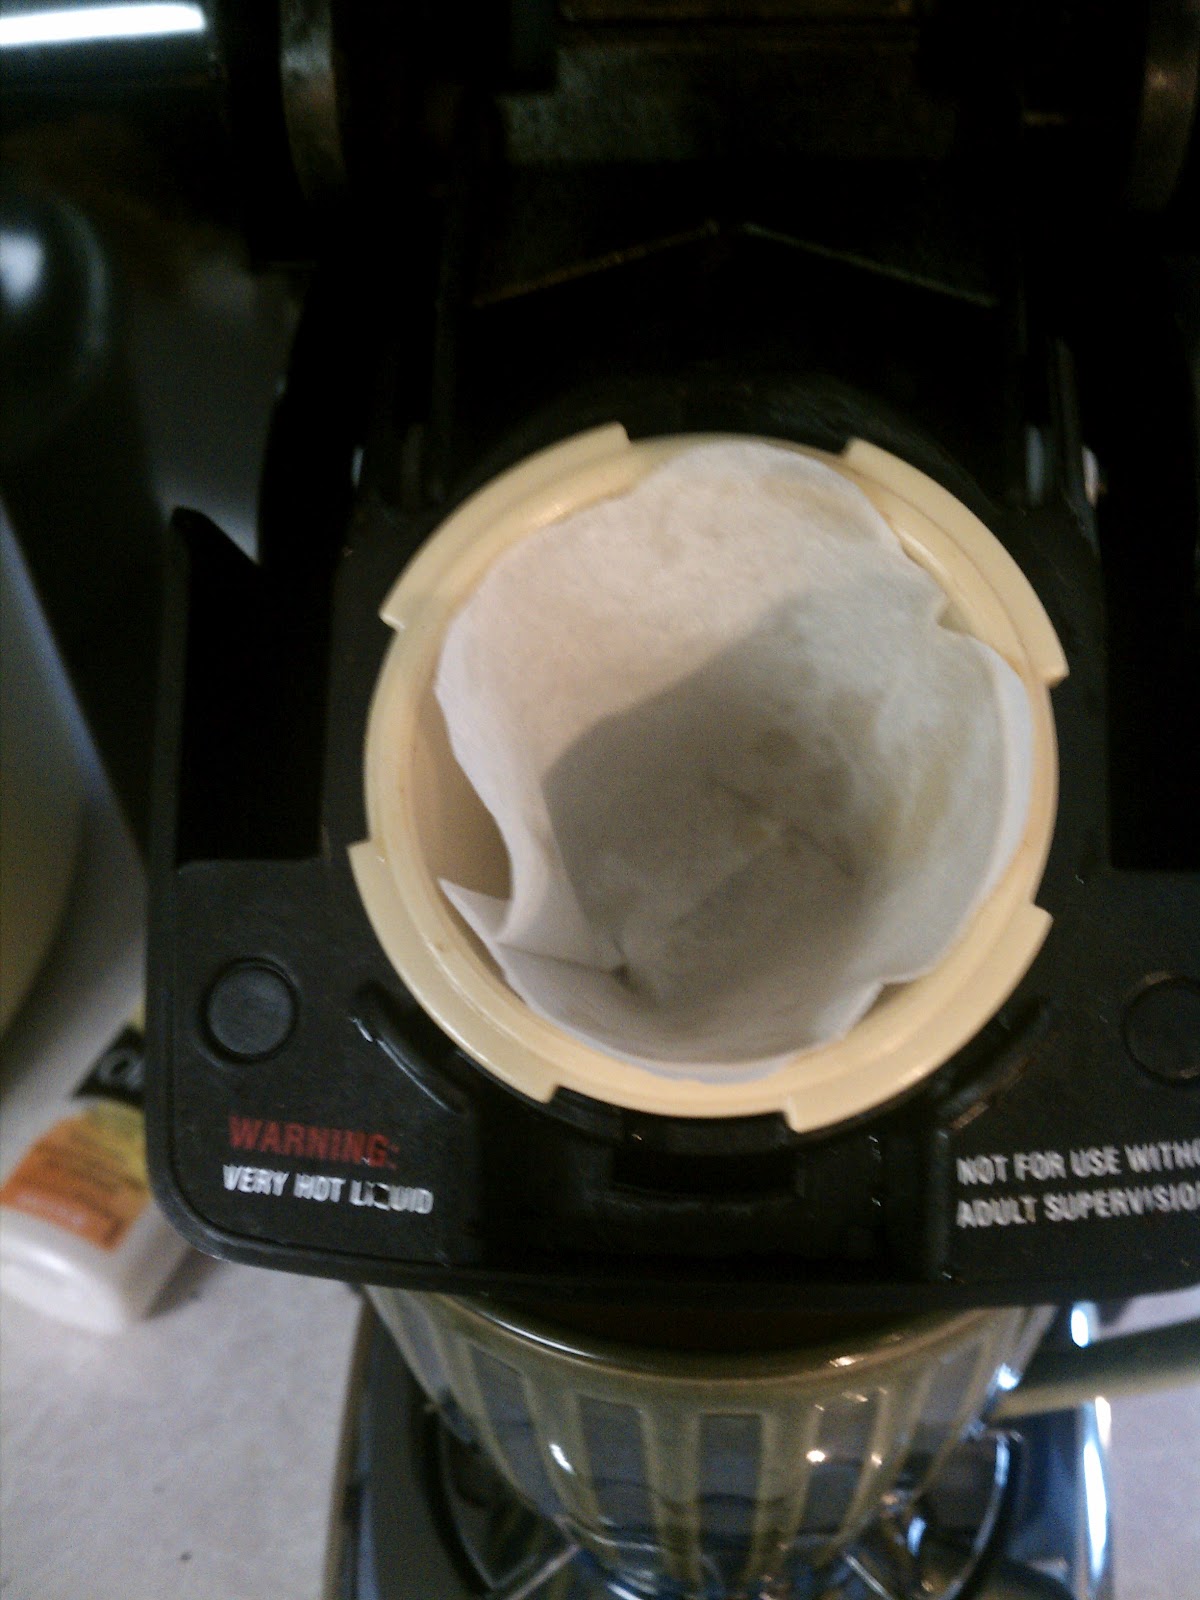
This is what it looks like Empty :) You can see the top of the carafe through the hole in the top of the coffee maker.
 Place the carafe on the coffee makers warming plate.
 Turn on, wait about 5-10 minutes, swirl to mix spices in and serve!

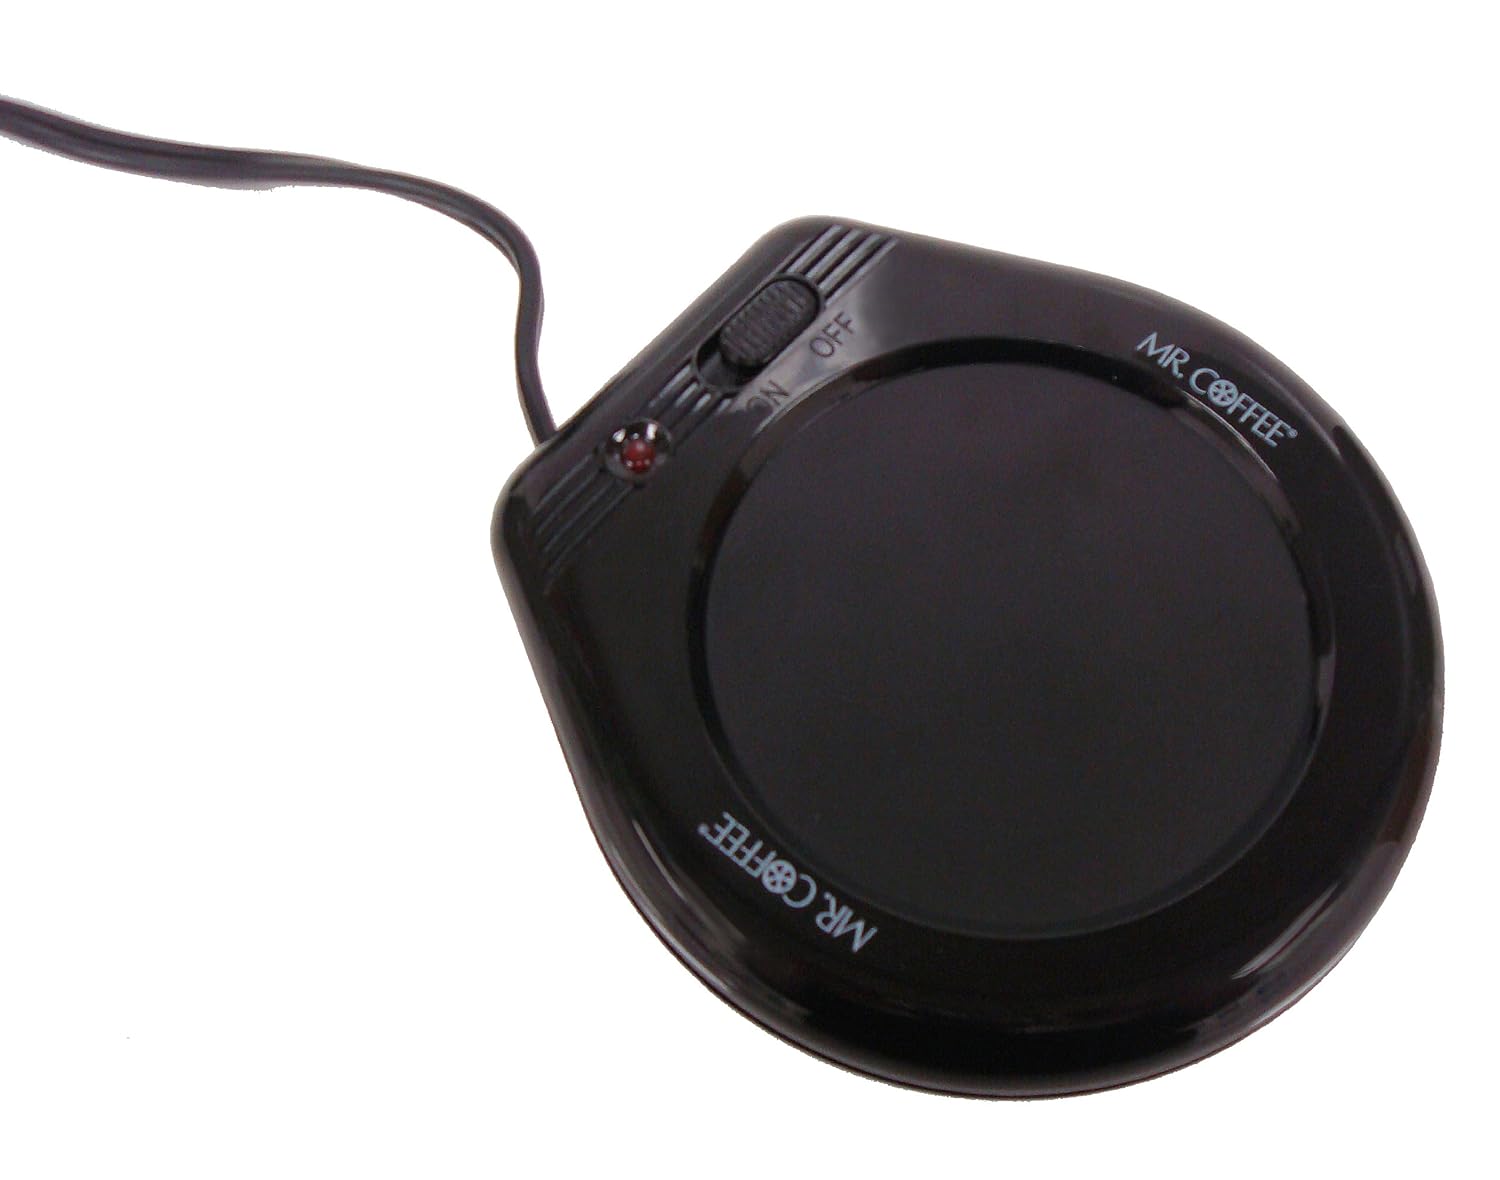
 Easy peasy! Essentially you COULD use a coffee/soup warmer like one of these:
Click here to find this model which I have and love. But I found that these do better for keeping hot things warm not warming cold things up. ;) and I like how much faster my coffee maker works!

Thursday, October 31, 2013

Babywearing for the Plus sized mama's

What started it all:

I was asked recently what I'd recommend for a plus sized mama who wants to baby-wear.
First thing I'd recommend is to buy a tape measure and measure your waist. Knowing this measurement will help you when buying a carrier. In many cases a carrier has straps and you need to know if they are going to fit your waist.
Measure just above your hips and at your natural waist(usually around your bellybutton). If the measurements for the carrier's waist ties/belt will wrap around the largest measurement with room to tie a knot(I'd guess add extra 2 feet) then you are probably safe.

DIY Products:

For the crafty mama's I'd first recommend making a carrier. A Mei tie or a stretchy wrap will be fairly simple.
Stretchy's are recommended to start at 5 yards but If you go with 6-7 you will probably be safe. I'm a size L(when newly breastfeeding) 36D cup and a 5 yard wrap is PLENTY long enough for me. I'd guess it would fit an XL mama as well and you could add another yard per size and it won't hurt anything. Once you've wrapped a squish up in the wrap you will be able to tell if it's too long. And if it is, simply trim the "tails" shorter.


Here's some great tutorials on making a stretchy wrap:
http://aaronandmelissaanderson.blogspot.com/2012/10/diy-moby-wrap.html
http://www.elleapparelblog.com/2012/02/moby-wrap-tutorial.html
The stretchy in this requires some sewing but would be super cute and even cheaper to make:
http://lulastic.co.uk/parenting/babywearing/babywearing-three-easy-and-quick-diy-sling-tutorials/
And in case I forgot to mention it this is typically a NO SEW project!
There is a downside to stretchy wraps though, they really start to get uncomfortable for mom and baby at about 15lbs and you CAN NOT wear them to do a back carry as it is NOT safe.
Here are some of my favorite Stetchy wrap Videos: (You can also look for directions for using the "moby", or "sleepy" wrap but beware any that say it's ok to do a back carry.)
http://www.youtube.com/watch?v=J19oOkQ61hI&list
https://www.youtube.com/watch?v=fhBmqw7npYU


Next would be a mei tie. This one is VERY easy to make if you can do a simple straight stitch on your sewing machine. I recommend this pattern:
McCall's M5678
Ignore the pouch sling as it's unsafe. The striped version is the one you want. Simply make the straps LONGER and you'll be set.
You can use this for a newborn, and infant and even small toddlers.
For free patterns:
http://www.grumblesandgrunts.com/2010/10/how-to-sew-mei-tai-baby-carrier.html
http://www.afullerday.com/2008/01/diy-hood-to-headrest-mei-tai-tutorial.html


And wearing directions:
https://www.youtube.com/watch?v=f61gevDtAwQ
http://www.youtube.com/watch?v=59oTw0NyTbY
https://www.youtube.com/watch?v=c7wn0I-Q0hE&list=PLWP8nuAo3nbNVl_DZiQB9HgIIYjzVo9g9&index=9
https://www.youtube.com/watch?v=YW75FWt1Z0A&list=PLWP8nuAo3nbNVl_DZiQB9HgIIYjzVo9g9&index=10
https://www.youtube.com/watch?v=G-DlyAxI_uA


On the Market:

Now there are products you can buy that will accommodate the plus sized mama.
Wrap Conversion Mie Ties are a great one. The straps are VERY long, and wide, so super comfy. They are more expensive as they are made from pricey woven wraps. You can also look for a Mei Tie with "wrap straps" and that should work.

Next you can try the infantino Sash Carrier:
http://www.amazon.com/Infantino-Sash-Carrier-Black-Gray/dp/B005C9ODQ6
There are several reviews that state it to be great for plus sized mommies. And there are a few variations of the carrier with different "prints". So long as it's the mei tie carrier this is a GREAT carrier. And you can get them used online for so cheap. An excellent alternative to a bjorn, snuggli or other crotch dangler, or expensive carrier.

Ergo Carrier:
This carrier on it's own isn't perfect for this but This company sells an extension belt that makes the waist big enough and that is what you'd need:
http://www.amazon.com/ERGO-Baby-Carrier-Waist-Extension/dp/B00273Z0AS/ref=sr_1_4?s=baby-products&ie=UTF8&qid=1379991498&sr=1-4&keywords=ergo+waist+extender

A ring sling:
Most ring slings come in sizes but you can find plenty of mom's who custom make them and can make them the lengt you need. You typically measure from your shoulder to your hip double that, then from your shoulder to where you want the tail to hit on your leg. Though each sling maker will have recomendations for measureing.
Or just buy and XL or Large sling. Make sure the product is made with Sling rings and not any other kind. Sling rings are weight tested individually up to 100 lbs and are MADE for baby wearing. Any other ring is not tested for such and has unknown weight and lead contents. It also may be welded which is a weak point in a ring and can cause breakage, or can tear fabric and cause injury to your baby.
I recommend the following sellers:
https://www.etsy.com/shop/SnuggyBaby
https://www.facebook.com/Bynanas


Lastly I'd recommended wraps. Wraps are really the MOST versatile carrier out there. And super supportive. Wraps come in many brands but some good starter LittleFrog, Wrap Nap Fairy, BB Slen, Bara Barn,and Chimparoo.
Budget is anything under 100.00 as most wraps are several hundered dollars or more. Even more so for discontinued and hard to find "prints"/colors. All wraps that aren't termed "stretchy" are woven and are great for newborn and up in age. You can wear a 4 year old or a newborn in a woven wrap.

You can even make one yourself with a little work from a tablecloth. There are many tutorials over at the babywearer forums on how to do so. ;)


Photo credit goes to my beautiful mama friends for volunteering their photo's for me to use! Thanks Tamera S., Becky W., And Sabine K.!


Friday, September 13, 2013

Rebuttal for the Stir's "5 places mom's should Breastfeed Discreetly"

I am reposting this so I can rebut it:
http://thestir.cafemom.com/baby/161099/5_places_moms_need_to?result=comment_added&comment_state=member&success=1#comment_4073979


First by law in our state a Woman can nurse her baby WITH or WITHOUT a cover legally anywhere she is aloud to be. That covers all but the airplane one.


To properly rebut all of these I am posting them in italics with the original text and my rebuttal underneath. 
  • The Pool -- Might as well start with swimming pools since the mom from Illinois is who got me thinking about breastfeeding in public in the first place. Pools generally have tons of kids in and around them, and as the mom of a 7-year-old, I wouldn't want him splashing around and seeing a mom sitting near the pool with the top of her swimsuit down. I already shudder at the thought of him looking at breasts when he's a teenager, let alone as a second grader.
 At the pool I'd venture to guess that there is more boob or cleveage showing on those teen girls and other moms/women than there is exposed by a nursing tot/baby. And as to children seeing... they NEED to see a nursing baby. It's normal. It's natural. And only through seeing it will they understand that.

This is what boobs are for and our society has made them about sex. In the past it has been the Neck, wrist, or even ANKLE! Then it was legs. That said we've gotten past those hangups, Let's move past this America.

"but what do I say to my child? How do I explain it?"
Simple you tell them the baby is drinking mommy's milk that her body makes perfect for baby.
I'd like not to have to explain to my toddler/child that some babies drink formula. But I handled that simply by telling her some babies drink milk in a cup/bottle. She was fine with that explanation.

  • Restaurants -- I've seen moms feeding their babies in restaurants on several occasions, and I'm fine with it when they're wearing a coverup. But I do remember one occasion where I looked over at the table next to me in the middle of my meal and saw a boob in its entirety (before the baby had latched on -- so I saw this woman's bare nipple). It made me feel very awkward and uneasy. It was just so ... out there. Didn't have much of an appetite after that.
Ok first if mom has a right to be there then so does baby. That said till bottles require a coverup breasts shouldn't either. (after all aren't they really a faux boob making them a sex object too?)  It's a nipple. Why are you looking at other people anyway? And seriously have you never seen a nipple before?
If it bothers you so much perhaps you should suggest to the owner that they instal a nursing room. I know I would have loved one because nursing a distract-able baby while eating is super annoying but it has to be done sometimes. 
  • Airplanes -- Yes, I KNOW babies need to eat on the plane as much as anywhere else, but this one honestly has more to do with safety than anything else. With all of the cases of creepy men groping women or hitting on them mid-flight -- the more covered up moms are, the better. Honestly, I'd probably ask the flight attendant to seat me in a row of women if I was a breastfeeding mom.
 OH an airplane. First nursing isn't sexual. Second, if it turns a man on there is something wrong with him. Third let's give men more credit. Forth, I'd think you'd rather see my nursing kiddo than her screaming and crying the whole time. ;)
  • Kids' sporting events -- Again, there are just too many children running around, and it's probably not a good idea for them to look to the sidelines and see breasts staring back at them. I just keep thinking about my own child and what he'd think (or say out loud) if he were to see too much skin.
 That depends on what you've taught your child. My daughter is 2. She simply goes. Oh the baby drinks mommy milk! and looks away. And is busy doing other things. It's really not a big deal unless you have some hangup you've taught your child.
  • Church -- It's wonderful when moms want to bring the kids to church and nurture their faith early on. But a coverup is a necessity with a baby in tow. Do I really have to elaborate here?
I am a God fearing, Christian woman, who goes to church every sunday. I have been a christian since I was in Kindergarten and asked Christ into my heart. I do not beleive a coverup is necessary in church. I also don't beleive a talkative or screaming child should have to leave the service (but that is a post for another day.)
Being discreet doesn't mean you have to use a giant, animal print, neon, cover to "hide" what you are doing. It means latching baby on quickly and paying attention to thier cues so they don't need to cry to let you know they are hungry. It means making sure your baby is happy and content and not drawing attention to yourself.
Many nursing mom's don't use a cover but instead use the "one shirt up one down" method and find it to work quite well and cover everything.
I myself used this method in church as have many other women.

Any other problems we need to discuss? Leave them in the comments. ;) I'm sure I have a reply for them too.

Monday, March 25, 2013

Cloth Diaper Must Haves

I've been thinking a lot about a post that might help my readers lately. Due to lots of traveling I have had diapers on my mind.
I've been using cloth exclusively for a little over a year now and part time for a few months longer than that(that was before the allergy to disposables became clear).
So I've played with many types and kinds of diapers and accessories. And there are some that I keep reaching for and some I don't. So I thought I'd recommend some Diapering Items to help round out or start a stash.

1.) Flats
These don't seem like a great option as you have to fold them. But they are super versatile! They make a great burp rag, tie on bib, and tablecloth. Also for travel these are the most compact option. There is a bit of a learning curve but they are totally worth it.
Also super cheap. I love the target brand Flour Sack Towels as they work great as flats! And they are available EVERYWHERE.
I recommend at least 10 in anyone's stash.

2.)  Prefolds
These are awesome to keep on hand for burp rags, diapers, backups on wash day, or if you use mostly pockets, an extra insert here and there. They are SUPER absorbent, and easy to wash and dry. You can bleach them after yeast infections, sun to remove stains, and they are basically the most versatile diaper out there.
Paired with an extra absorbent insert these do FABULOUS over night for super pee'rs.
I recommend at least 5 Toddler size in a stash, and if you have super pee'rs as many as you have pockets in Infant size to use as inserts.

 3.) Covers with a Front Inner Flap
Think bummi's or flip diapers but I prefer Work at home mom made covers honestly. They come in just as many cute prints. One size, and sized options. And are very affordable.
I recommend at least 5 of these in any stash.

4.) Stay Dry Liners
You can buy these or they are super easy to make. Buy a yard of Microfleece at the fabric store. But into strips about 4 inches wide and at least 8 inches long. 9 or 10 is better. No sewing required as it doesn't unravel. lay these between baby and the flats or prefolds and they will stay dry overnight.
These are also great if you need to use a non cloth safe cream or your baby is having tummy issues as they rinse REALLY well if they get poopy.
I recommend one yard of fabric cut into as many strips as you can get from it.


5.) A Spray Bottle
I don't use a wipe warmer. Babies have been used to room temp wipes since forever. If necessary I use warm water on a cloth. But usually I use a spray bottle that I keep in her room that has mostly water in it. And a few essential oils to keep her smelling fresh and bacteria or fungas at bay.

6.) Lavender and Tea Tree Essential oils
I put 3 drops of lavender in my spray bottle when I fill it. Tea Tree is a natural anti-fungal and I use it in the wash occasionally. Usually after we've been sick to kill germs and fungus.
And they both smell nice.
One Bottle of Each on hand at all times is a good idea.


7.) Vinegar
Works great in a spray bottle to keep smelly diapers in need of wash less smelly. Works great in the wash for softening, and for keeping stink at bay. You can clean with it and not worry about baby drinking it as it's not harmful if ingested. It works to get rid of vomit smell in place of febreez, and even pet odors to an extent.
If you have hard water this can make mineral buildup worse so use with caution. If not though it's awesome!
A large bottle. Keep this on hand at all times.

8.) Downy Ball

Most grocery stores have these in the laundry detergent isle. Check the little hanging displays or on the top or bottom shelves. You can also order them from amazon but they are cheaper in the store.
I use these to dispense vinegar. Reason being vinegar works best in the last rinse cycle and the ball dispenses in that cycle.
I recommend one in your washing supplies.

Thursday, December 27, 2012

Breastfeeding Do's and Dont's

Now that my DD is nearly 16 months old I thought I'd share some of the "Dos and Don'ts"  That have helped me through my relationship with her. For us it was relatively easy and we are so glad it has been. However some things have been really hard like night weaning and nursing in public. Not because of anyone else but because those are my own personal hurdles.


So here's my short list of do's and don'ts that got me through:

1.) DO find a peer group of positive Breastfeeding moms. If you can't find a support group locally, find one online. Here are a few of my favorites:
http://www.mothering.com/community/f/23/breastfeeding
http://www.facebook.com/groups/kellymamas/?fref=ts

Also if you are a member of an online community like what to expect, or baby center, then ask if the due date club has a breastfeeding group on facebook or otherwise. My DDC's support group was awesome and having mom's in it who where new to it like me, and who where experienced was awesome.

2.) DO Set goals. For some long term goals are better(me) for others short term. Some mom's set goals for a month, then two months later, and so forth till they get to their end goal.
Having a goal gives you something to work towards and feel accomplished about when you are done.

3.) DON'T worry about pumping for the first few weeks unless you are planning to return to work and will need to be feeding a bottle. In that case wait at least a few days.
Pumping doesn't give your body the necessary stimulation needed to produce milk like the baby does. Many women respond to the pump but others simply do not. That doesn't mean that your body isn't producing milk. And pumping output does not equal how much baby is getting when they nurse! Pumping or not doesn't mean you can't breastfeed.
Some women can still breastfeed part time, only at night, before they leave for work and after they get home, etc. So not pumping isn't the end of the world.

4.) DO Chart your cycles once they return. Breastfeeding alone is NOT a means of contraception. Knowing when you will ovulate is the BEST way to avoid pregnancy. I know SO many mom's who get very upset that they are preggers a few months after giving birth and if your body isn't ready, or you're not ready it's fairly easy to avoid even if you don't use birth control, or condoms, or IUD's. There are free apps and websites to track your cycle. Popular among my mom friends is:
www.myfertilityfriend.com
And my favorite is a free app for iphone or andriod called "My Period Tracker":
https://play.google.com/store/apps/details?id=com.period.tracker.lite&feature=search_result#?t=W251bGwsMSwxLDEsImNvbS5wZXJpb2QudHJhY2tlci5saXRlIl0.

5.) DON'T exclude dad. During the early weeks and months, dads can feel alienated from their new baby and wife. Baby's nurse a LOT (almost constantly it feels like) in the first few weeks and months. And dad can feel like baby doesn't like him, know who he is, and like he has nothing to do with the baby aside from change diapers.
Empower him by giving him jobs or having him help. Newborns are floppy and hard to position on ones own. Dad can help! Have him get you water, have him become a burping expert(my hubs was way better at this than I was.), Have him remind you of different positions to try, Teach him about breastfeeding and make him an expert! My hubby encourages many new dad's now about how awesome Breastfeeding is and how to help their wives. A little love an knowledge goes a LONG way!
6.) DO remember that all the bad things are only for a season. Breastfeeding can be hard sometimes. It's not possible to adjust to less sleep ahead of time. It's hard to wake up and cluster feed every 45 minutes at night when all your addled brain wants is some ZZzzzz's. Sometimes baby might not latch good. Or ALWAYS fall asleep on the boob, or spit up, or have reflux, or allergies, or you might get yeast, or mastitis.
All things are only for a short time. Baby's are only little for a short time. They only need mom 100% of the time for a very short time. You will eventually sleep again. You will eventually get through the dark spot and over the hump.

7.) DO be stubborn. Don't give up! Honestly it can be hard sometimes but being stubborn and refusing to say you're "trying" means you only have to options. To fail or succeed. If you failed the last time, then know you CAN succeed the next time if you want! Every baby is different and while the first might not have latched the next might be a perfect nurser.

8.) DON'T sell yourself short! You're a mom! That makes you a superhero! You grew a person in your body. Or you adopted a special little one, or fostered one someone else couldn't take care of. No mater how you came into motherhood you are a superhero now. There are people you couldn't pay to have your job and people who would pay all the money in the world to have it. It's a blessing. And you are amazing!
Remind yourself of all the amazing things about yourself when you are struggling emotionally.

9.) DON'T be afraid to seek help if you have problems. It doesn't make you a failure. It doesn't mean you did anything wrong! Breastfeeding though natural isn't easy and some babies and mom's need a little help. It's ok and the sooner you get it either in person or through your support groups the sooner you can move on and have an awesome breastfeeding relationship.

10.) DON'T Listen to those who say to offer formula as a solution to every problem. Or to those who tell you to add rice cereal to bottles to get more sleep. Those bits or "advice" or "booby traps" are unsafe, inaccurate, old fashioned advice.
Educate yourself:
http://www.drmomma.org/2010/10/virgin-gut.html
Also no pediatrician no matter how experienced she may be as a nursing mom, is a  breastfeeding expert. If you have a problem ask a Lactation Consultant, or better yet a International Board Certified Lactation Consultant! Most hospitals have one on call that you can phone and talk to or set up appointments with.

11.) DO nurse however you feel comfortable! If you feel better with a nursing cover then use one, if it makes your baby and your nursing relationship more of a hassle don't use it. If you feel better "popping" a breast over your shirt neckline then do it! If you feel better using a nursing shirt, and no cover do it! It's your baby and your body. Know your state laws and don't apologize or make excuses as to why you nurse the way you do. It's what works for you and baby and that's all that matters.

Friday, October 12, 2012

Babywearing Tips and Tricks

I'm copying this from my facebook notes since I felt the info is too good to only share with my "friends" and family. :)
I am a crunchier mama and love to wear my little one. I have back issues and felt wearing her would be easier on my spine than carrying around the bucket style carseat. I also see so many mama's having trouble lugging their baby 6 months plus in age and the extra 15lbs of carseat on their own. I felt babies in these seats don't get as much attention either as they are talked about rather than talked to.  There are so many benefits to baby wearing too. 

The upright position is good for babies with reflux. It can help them feel safe and close to mama which is great when external stimuli scares or startles them. And it's just so sweet to feel your little one snuggle up against you and sigh right before they fall asleep. 
It's also so good for their hip and spine development If they are in a carrier that spreads from knee to knee rather than "dangles" from the crotch. (ie Baby Bjorn and snuggly=bad) 

Anywho I have found so many cool resources for babywearing and wanted to put them somewhere where they don't get lost. So the babywearing Tips, Tricks, and Videos Note is written.
“Research supports that people who hug more are happier. When a couple hugs for six seconds or more, mood-boosting/bonding chemicals called oxytocin and serotonin are released at an optimum level.”

“Babies who are hugged more even evidence better physical development and more brain power. “Children who get sustained form of touching, such as a long hug everyday are smarter.” Quote from Jay Gordon, M.D., co-author of “Brighter Baby”.”


Mai tie: 

taking baby out without untying the mai tie: http://youtu.be/c7wn0I-Q0hE


Putting baby back in without untying mai tie: http://www.youtube.com/watch?v=YW75FWt1Z0A&feature=youtu.be


My favorite way to put baby in a back carry:http://www.youtube.com/watch?v=59oTw0NyTbY


-*Pics*

baby wearing in a Mai Tie with a newborn
mai tie using a back carry. Sweetness was about 6-8 months old in this photo. 


Ergo or Soft Structured Carrier (SSC):
 Putting baby on back easier more secure:http://www.youtube.com/watch?v=6jUZMK0D2As


ERgo Orginal, Preformance, and Sport review: http://www.youtube.com/watch?v=ap6ro1nnDLs&feature=related
 

Pictures:


Babywearing at a park 
on the trolley
  
At the zoo..

On the airplane ( the straps meant when she fell asleep I could also sleep and not worry about dropping her.)

At Target! 


For my back the SSC has really been awesome. It gives me support and puts Sweetness's weight on my hips and has padding and security plus lots of ways to adjust it. I highly recommend this style of carrier. 

Monday, July 16, 2012

Little sewing tip!


If you like me are constantly loosing your chalk and happen to always have a random nub of soap, to small to wash things with but too big to toss I have the perfect solution. Use that soap nub to mark your fabrics!
It marks darker really well and washes right out!


Monday, May 14, 2012

Keurig Refill Experiments


I was given a keurig Mini for my birthday this year by my in laws. It was a joint gift and I love it! However what I don't love is the lack of decaff coffee options, and the pricetag on the coffee. 
 I love the idea of refill-able filters for it but had heard and seen horrible reviews for them. I also loved the idea of refilling my old plastic K-cups. I saw some tips on pinterest on doing this and decided to experiment. 

First I started with refilling the old K-cups. I removed the foil top, dumped out the coffee and rinsed thoroughly. Then I let them dry overnight. The next day I added my own coffee to the dry k-cups. I filled to about 1/4 of an inch from the top of the kcup. Then I sealed the top with Glad brand Press n' Seal.

 This was my first one and I didn't seal the edges very well. I cut the press n seal to short on one side. This resulted in a few grounds in my coffee. But not even 1/2 a tsp worth. My old coffee pot was worse than that. 
BUT! I knew I could do better. So the next one I want more careful and it looks like this:

I smoothed the plastic out before I used them. Here's what they looked like used:

One on the right was the one that leaked grounds. The one on the left didn't leak anything. Worked perfectly.

However I found one of those refillable filters for 12.00 at Publix and really wanted to try it. I'd heard the same thing about them getting grounds in your coffee and producing a weak cup. Well I figured it couldn't get any worse. So I splurged and honestly it took some tweeking but I got a decent cup of coffee and no grounds in my coffee. :)

I didn't rinse the lid when I took it out. :P Anywho, It has these 3 parts. You are supposed to put a filter just inside the dark peice and then screw the cap on. Well First time around I got strong coffee with a LOT of grounds. But I rechecked my directions and I came up with a plan.
First I put a filter inside the tan piece:

then snapped the dark piece inside like it is supposed to go and added a filter in there too.  
   
NExt The directions indicated that one should make sure the edges get laid flat on the plastic edge. I think this is so once you add the grounds, the lid can hold it in place and prevent the grounds from getting in the coffee. So I did that:

And Wha-La! My yummy cup of mostly cream cause that's how I like it coffee with no grounds in it!


I have a new way to enjoy all my yummy decaff coffee and can still use my keurig with the little K cups if I want to.

Hope this info helps someone else! 

Thursday, March 1, 2012

Mommy tips and Opinions Pt. 1


So I've been a mom now for 6 months. That is half a year which blows my mind! There's been a few things I've learned about random baby stuff. It's not critical, others may have other opinions but I thought I'd share my wisdom.

1.) Don't rush your baby to grow up. 
I find myself saying "I can't wait till Sweetness does xyz." What I don't realize is by her growing to do xyz, she grows out if something else. The moment's you have now are precious and fleeting don't rush them.

2.) Baby shirts or onsies are better with a "lapped" neckline. 

Not snaps, and definitely not buttons. They're easier to put on and fit longer.

3.) Bibs are better with snaps not Velcro.

the Velcro seems easier and it's cheaper, which normally Id be all over. BUT, when washed that Velcro ALWAYS comes undone and snags on the precious handmade baby blanket that Nana made, or the ONLY pair of tights that fit right. Trust me snaps are better.

4.) You don't need everything. 

There is SO much baby junk out there. the brands will tell you you need the bounce seat, the swing, the bumbo chair, the exersaucer, jumparoo, johnny jumper, baby gym, etc. but you don't.
Get a good baby carrier, a fun mobile for the crib or pack,n play. or if you co-sleep, make sure to have a ceiling fan(babies are fascinated by them I don't know why). Sweetness outgrew her swing fast, and once they can sit up or weigh about 20lbs they're usually unsafe. the bumbo is ok, but the high chair is better since the tray came with it, and you can strap the baby into it. (plus when clean put toys on the tray)
There are so many things like this. go for items that can grow with the baby, and don't be too focused on gender unless you only want one child. (this way you aren't selling all the pink to buy blue or green later)
Except for the boppy covers. buy those in a print that makes you happy. that thing is a life saver! lol


5.) Don't make banana's the very first solid food. 
The resulting poops after are so nasty. start with squash(it's not smelly), then pear or sweet potato( a little smellier but tolerable), then do banana. If you choose to ignore this I consider you a brave soul in the mommy realm.

I'm sure I'll have more later so consider this part 1!

Saturday, January 26, 2008


After all the frustration I keep seeing with ends and having them come out I've been working on this tutorial for awhile. I am posting it both on Craftster and my blog jsut to make sure it doesn't disappear. :)
Sorry it took so long the project I meant to use as the entire example was not working out and had to be frogged. So anyways here it is finally!

How to Crochet over Ends:
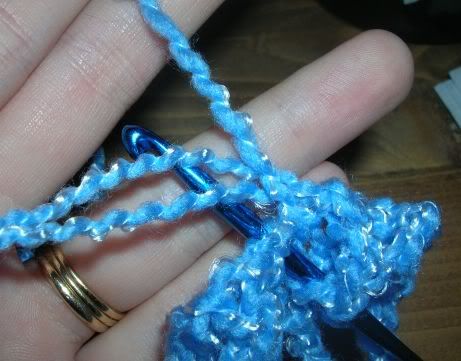
1.) First lay the two ends next to each other on top of your work. I crochet right handed so simply reverse the direction if you are left handed.


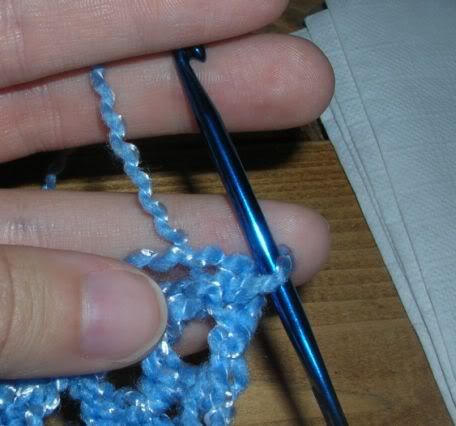
2.) Pick up the new yarn with your hook as if you were going to make your next stitch normally.


3.) Here you can see the working yarn in between my fingers at the top of the picture and the old ends on the bottom:


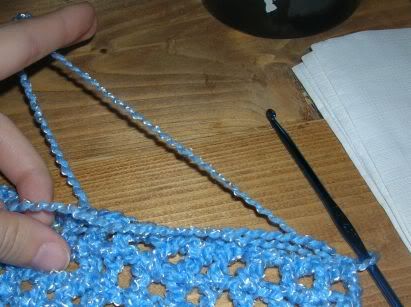
4.) Insert your hook into the top of the next stitch your ends should be on top of the previous row of stitches. (I'm doing a double crochet)


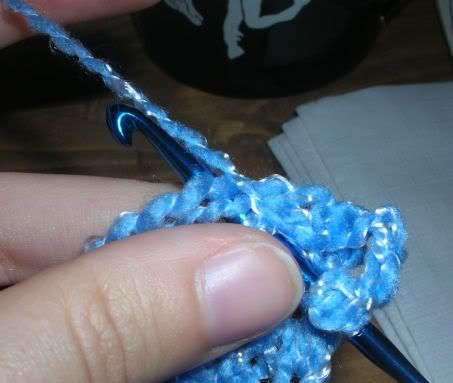
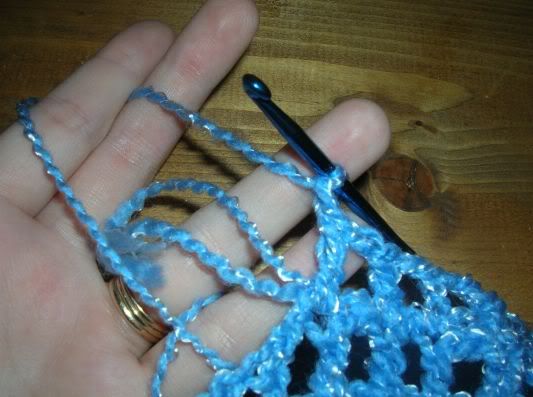
5.) Here's the same step from another angle:


I'm holding the working yarn in my first and second fingers and the ends with my thumb against my palm.


6.) Complete your stitch as if the ends are the top of the stitch you crocheted into instead of seperate. (i'm not sure if this makes sense or not.)


7.) Repeat steps 4-6 for a few stitches I typically do about 3 or 4. Next ignore the tails and crochet normally. You may have to move them out of the way.
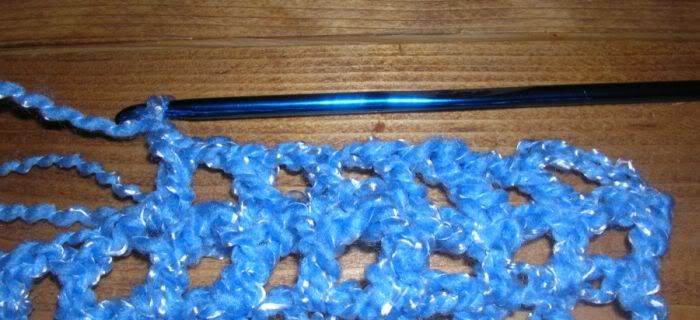
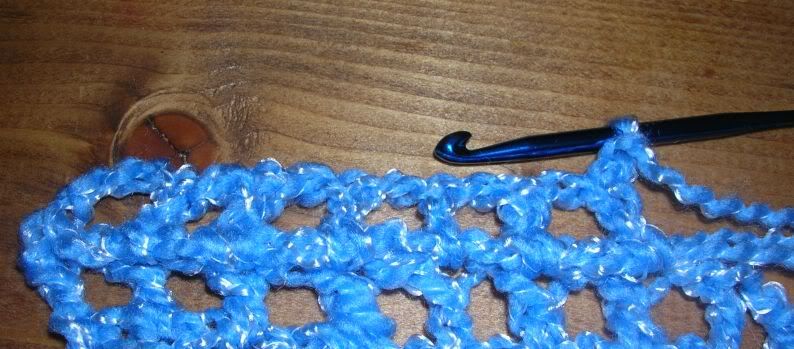
Front of row:


Back of row:


Give your ends a light tug to pull them tight. Then clip close to stitch.

If you don't feel this is enough security (like myself) then proceed to next tutorial...
Weaving in Ends:
1.) Supplies:
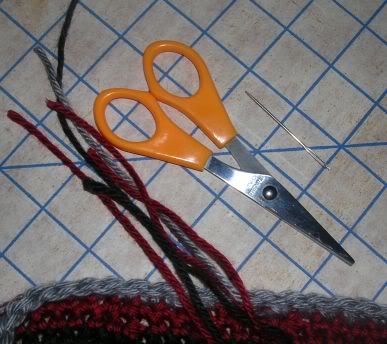
  • Large eye needle,
  • Ends to weave in,
  • And scissors


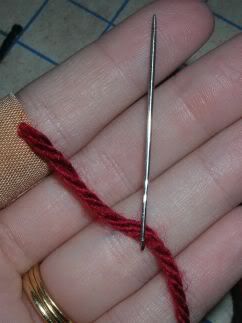
2.) Thread end through needle:


3.) 
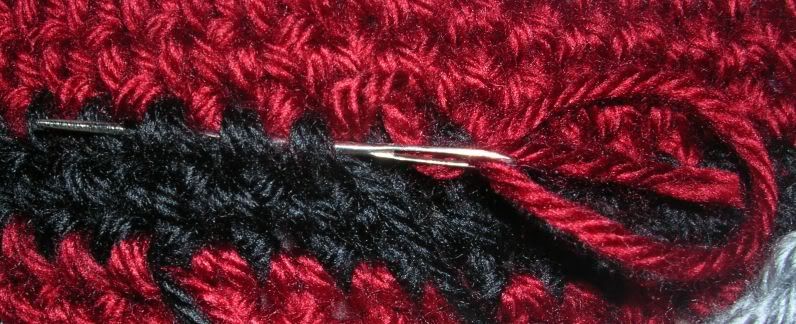
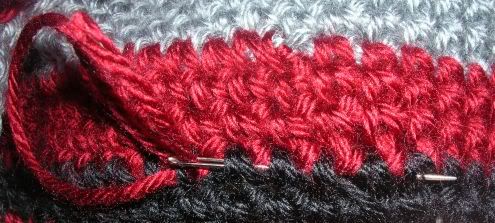
Insert the needle under the "v's" (stitches). I usually go under about 3-5 stitches. (I'm working from left to right.)


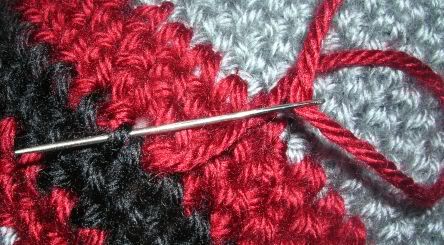
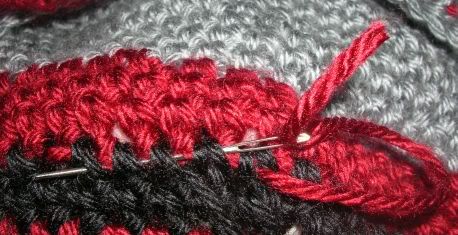
4.) You will see the end coming out of one stitch to the right of the needle. you are now going to weave back the opposite direction. Examine your stitches for a minute. Your stitches form little "V's". Think of each side of the V as a leg of the stitch. Now skip the first leg of the next stitch, on the left side. You should see that this is the stitch right next to your end. Insert your hook under the next leg.


5.)
 Weave under the next 3-4 stitches in the opposite direction.


6.) Repeat steps 4- 5 once more:


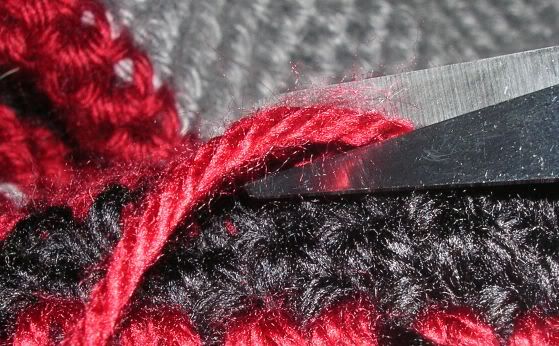
Clip ends close to stitches:


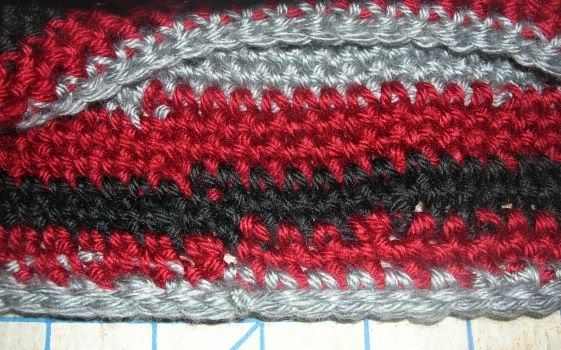
Stretch the crocheted piece just a bit.
back:


Front: