Friday, October 21, 2011

Nursing Shirt DIY


Hopefully it goes without saying but please do not make items from this tutorial to sell online. I don't mind if you sell them in your locall area but you must give credit to me for the idea. My blog url would be acceptable. This tutorial may not be copied or sold in any manner. all the pictures and text are copyrighted to me, Bethany Hall as of October 2011.


So since having Norrie I've been breastfeeding. the benefits are great for her and me. (lower risk of breast cancer for the win!)

The only downside? Like pregnancy clothing nursing/breastfeeding tops are super expensive! I'm sorry but 40.00 and up is ridiculous and highway robbery. So I took matters into my own hands and I want to share so we can all have inexpensive but cute nursing shirts!

Materials:
2 t-shirts. One should be the size you wear and one should be slightly bigger. I used two juniors OP "elbow sleeve" shirts from wal*mart. The bottom main shirt is a large and the one I cut up is an xl.
Wash and dry them. That finish in the shirts is awful and makes the finished product less stretchy.
  • A washable fabric marker(felt tipped works best)
  • Ruler or tape measure
  • Pins
  • Scissors
  • (not pictured) Thread in the main color on your shirt. I used white.

Measure down from the center front of your neckline about 3 inches and mark. Also mark between your breasts. I marked about an inch and a half centered between the two.
Mark about 1.5 inches from the side seam on each side. 
cut the from one of the lines between the breasts, to the line near the side seam.
You should have this. Repeat on other side.

Mark about 8.5 inches from the bottom hem of your extra shirt. I used a pin for this. You can use less but I had a striped shirt and wanted them to line up as much as possible.

 Cut up the side seams and then across the area with the pin.
This is where you should be at.
Now start pinning at the top. I line the raw long edge of the panel up with the wide stripe just below the neckline. For a non striped shirt you will start just below the neckline. Make sure to turn the raw edge under just a bit as you pin. 

Here's the shirt with the top edge pinned.
repeat on the sides.

In the case of knit shirts I'd say more pins are better. It helps prevent the fabric from slipping and stretching to much during sewing. 
Make sure you have a full or nearly full bobbin. This way it won't run out while you are sewing.

 You want ball point sewing needles. Use the orange band. Ball points won't tear the knit fabric. 
Your stitches per inch should be around 8.

Set your stitch to a nice big zig-zag.
 
Tension should be fairly tight.
Now we can start sewing! 
 Hold your top thread tight for your first few stitches. This makes sure the machine is sewing at even tension. Also don't pull your fabric as you sew. If you do this with a knit it will stretch and warp. Let the machine pull the fabric through on it's own. Just guide it with your hands.
Start sewing at the bottom of one of the sides, work up the side, across the top, then down the other side. 
 To turn a corner stop with the needle in the down position.


Lift the presser foot. The lever on the back of my machine is up to lift the presser foot.

Turn the fabric, and put the presser foot back down.
Lever down and so is the presserfoot. Sew the rest of the fabric.

Pull a few inches of thread out.

And cut in the middle.

Stitches on the shirt. :)
Remove your pins.
Now you will have two threads on the outside of the shirt. one on each side of the side seams. Thread one through a needle.

And push through to the back layer.

Remove the needle.

Some people simply cut the threads but I've had projects fall apart when this is the case. SOOO Tie them in a knot.

Then clip close to the knot. Repeat on the other side. 
Remember the holes you cut in the bottom shirt? Now we're going to finish the edges, technically you don't have to but it will prevent them from stretching out too much. Feel free to stop at this step.
Just make sure to wash your shirt before you iron it. If you iron it the marker marks won't come out. Wash it first. :)
Start sewing. Make sure to have one of the steps of the stitches go on the fabric, and one on the opening.

Hopefully you can see what I mean in these pictures.

Make sure to turn your corner and then come down the opposite side of the hole. 

Pull out a fe inches of thread and cut.

You will have two threads on the outside and two on the inside.
I couldn't get a good shot of this but tie the two on the inside in a knot and cut close to the knot, and repeat with the two on the outside.
Follow he same procedure for the opposite opening.
And you're done!


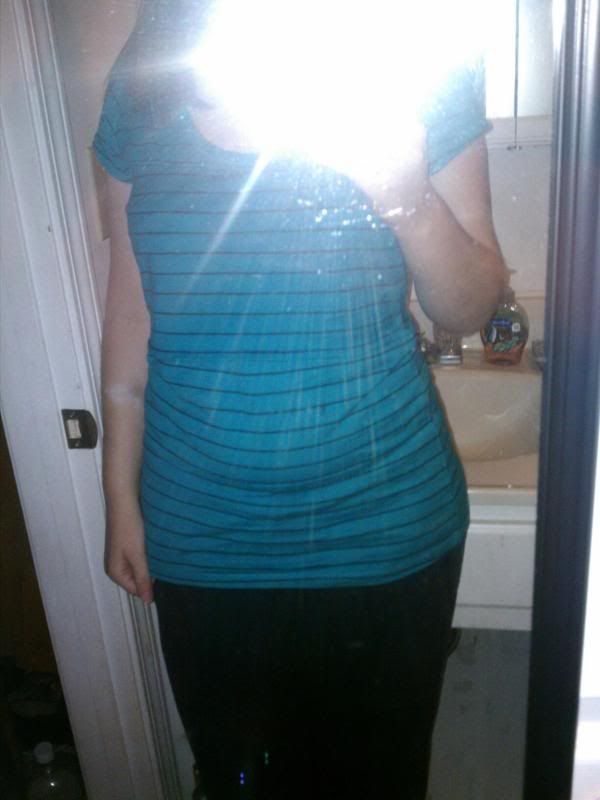
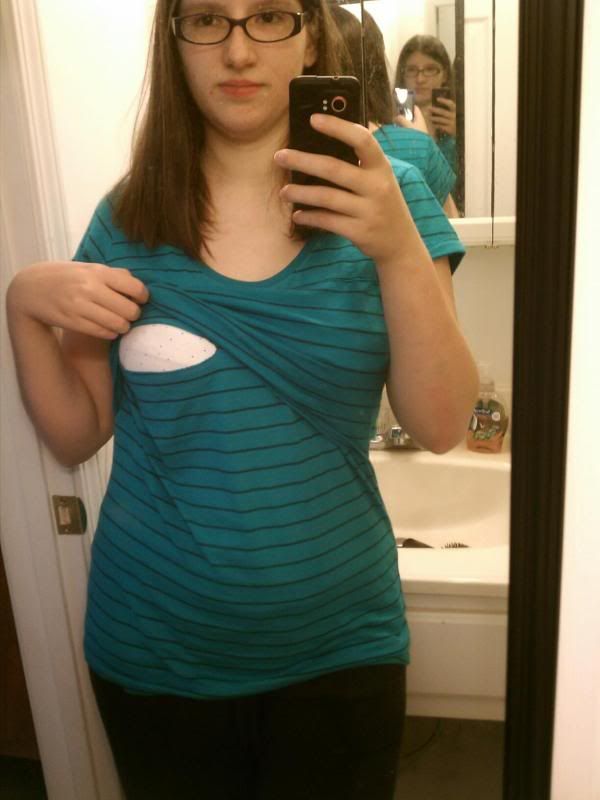
And you're done! Nursing bras are ugly maybe one day I'll tackle those...
The best part about this shirt is you can make it with long or short sleeves. And for very cheap! The two shirts I used for this tutorial cost about 5.00 each. Same for the blue one in the bottom pictures.
To Nurse simple unclip the nursing bra, and lift up the front flap. The openings should be right across the breast with the nipple fairly close to the middle.
Easy peasy!

Wednesday, October 12, 2011

Welcome Earthside Norrie


I woke up at 1:30am Monday August 29th with some crampy contractions. They weren't regular so I tried to sleep but couldn't. Hubby woke up at 3 and I told him what was going on. He decided to stay home and work a half day. We went for a walk around 1 in the afternoon. After calling our midwife and my sister. Sister decided to head over and hang out. Midwife said she'd be by in an hour or so based on my description of the contractions.
walked halfway up the street and came back. That seemed to move things along. When my midwife got there we were at 4cms and very thin and stretchy cervix. 
She went to finish her prenatals for the day and called her assistant to come stay with us in the meantime.

We labored standing, leaned over the bed or birth ball and on all fours in child's pose. By 6 pm we where at 6 cms. I was told I could try the birth tub. Baby wasn't happy about the tub temp so we had to get out. I was so sad because asside from size the tub felt wonderful. I do not remember at what time we where told we where at 9cms with a tiny bit of cervical lip. I was told not to push just yet but try to relax and use little grunts to move baby down. 

So we started pushing for real around 1 am. I wasn't getting far in the tub (which We'd decided to try again once we where further along) so they had me get out and use the birth stool. I liked gripping the handles on that. At that point each push was a little progress but not Much. Her heart rate had some decels but they came back up on their own and where within the norm. I know I yelled and screamed a bit. Poor hubby was so upset watching me in pain. He told me later that he didn't understand some of the sounds I was making or what they meant so it was hard for him to know how to best help me occasionally. Finally after multiple positions we found one that worked. On my left side with my leg up in the air. Hubby supported my leg because my arms felt like they where going to fall off at that point. At 3:55 am Tuesday morning Norrie was born. I was so thrilled to have her OUT! Pushing was really the best part for me. I was working with the pain and could feel the progress rather than just dealing with it. 
I tore in two small spots. My midwife reffered to them as "skid marks" since they are super small and surface only. I'm convinced the water, and heat, and perenial massage during pushing is why it was so minor. 
When Norrie came out she had meconium all over her and had breathed some in. Her breathing sounded "like a purring kitten" according to my hubby. The midwifes suctioned a good bit out but she still sounded terrible and was having trouble crying. My main midwife asked hubby if he could call emergency services so they could continue to use oxygen and suction on Norrie. Hubby called and was very calm.  EMS arrived right as Amie cut the cord. Hubby went with Norrie and the midwifes assistant followed. (as we'd planned in case somthing happened)There was no indicator of meconium during the birth and even when my water "broke" we.didn't see anything. 
I delivered the placenta after being given a dose of angelina? And pitocin (to prevent Post Partum Hemorhage). I'm doing great and healing really well. I don't even feel the torn areas much at this point. 
The hospital got us set up with a room due to us wanting to breastfeed. The newborn nursery nurses where awesome at keeping us updated till we got our room. They where great and asked us what we wanted to do for everything and respectful of our wishes when we said we didn't want something done.  
Sadly the second night they needed our room for other families. And since we where not the paitients we where not the priority Norrie was. So that second night we sadly went home and left our baby in the newborn nursery. That was the hardest thing I've ever done. Even harder than giving birth. We went to walmart to pick up a few things and I heard a little baby cry and about broke down in tears. Thankfully the next day after sitting with Norrie for a few hours we where released and able to go home.  
I had said all along if we had to go to the hospital I would be ok with it because it would be where we needed to be. We where mentally prepared in case such an event happened and either the baby, myself or both of us needed to be transfered. My midwives followed proper procedure to the letter, and I am happy I got my unmedicated home birth.

My support team (hubby and sister) where awesome.

My midwife stayed overnight with me and when I woke up she'd cleaned up everything and run the washing machine all ready. She cooked me breakfast fed me, checked my bleeding then after I fell back asleep washed all my dishes and unloaded and reloaded my dishwasher. My house looks like nothing happened except there was a mattress in the floor wher I'd given birth and slept. 


I feel so blessed! Norrie weighs 7 lbs 3.3 oz and is 19 inches long. We speculate it took 3 hours to get her out due to my tailbone having been broken when I was younger. Total we where in 17 hour of active labor(4cm's and beyond in dialation) and 3 hours of pushing.


Norrie Marie Hall is now Almost 2 months old. I've been trying to get back to normal life and i's been hard but she is worth every bit of frustration, sleepless night, shower-less day, and spit up covered shirt. 

Skeptical Norrie Is Skeptical.

I mean could you get upset at this face?