Saturday, January 26, 2019

Dolman Shirts Head to Head pt 2


This blog has been in the planning for ages, but I got stuck sewing one shirt over and over, and then I needed pants more than shirts, we moved, and moved again, started homeschooling, and well life has been crazy!
But George and I buckled down and got it done!

But I'm still working on my plan to #sewallthedolmans And making progress on that. Though in the time it's taken me to write this and sew up the dolmans for this blog, I've moved my number of patterns to try from 7 to 14! And many new patterns have come out that I don't even have because I can't justify ANOTHER pattern right now for a dolman shirt.  I may NEVER sew them all! lol

So today's blog will focus on 5 patterns, some of which are free just like last time. I decided this time to make the sleeves as the pattern directs rather than alter them all to long sleeved like last time. Although I did add cuffs to one and will denote that in my info.

I picked fabrics that were called for in the patterns, had the right stretch, or that I had enough of to make each pattern from. So it's not quite as similar as last time. Sorry. But hopefully it's still a helpful comparison.

I took the most unflattering angles so you can see exactly how each top fits, A straight from the front, side view, arms straight out(to compare the "wings", and then a nicer photo.
So without further ado Dolman Shirts HEAD to HEAD pt 2!

First up is the Cloud 9 Tee from Striped Swallow Designs
  • This pattern has Layers and no trim the pages. 
  • Pattern is written for size xs - xxxl 
  • pattern has long and short sleeves
  • I use a XL shirt for the front panel, and some white cotton spandex for the rest. 
  • I made a size Medium bust and graded to a Large hip. This shirt is one of my favorites as the fit required no alterations other than grading. I didn't even have to size up the sleeves like I usually do for my thicker biceps! I've made 3 of these in various fabrics and can say rayon spandex is dreamy, and likely my favorite fabric for this top, but all of the WORKED and I got wearable shirts. 
  • This pattern is free with a code in the group! 
  • I made my own neckband as before but I should have made it a touch wider. I served off a lot on this one and the band is more narrow than I like. 
  • directions were totally fine. Plenty of inspiration photos, Clear pictures and text for each step and easy to follow.

Kirsten Kimono Tee from Maria Denmark

  • This pattern is Free! 
  • it has no layers and you do need to trim the pages. 
  • patten does NOT include seam allowance so you have to figure that on your own. I made the mistake of forgetting that the first time and had to scrap my project. 
  • I made size M bust, L waist, and XL hip. 
  • fabric is a walmart value french terry with a little one way stretch. I didn't hem the sleeves as I wanted to add self drafted longer ones after this so that edge is raw. 
  • Pattern is Short Sleeved only as written
  • I used my own neckband measurements but there is some suggestions in the directions about doing it with measurements, or calculating stretch.
    The pattern also has directions for using fold over elastic on the neckline which could be a neat feature if you used some fancy stuff. 
  • I really liked the outcome of this one. It has that comfy tee-shirt feel that I love so much. I did take a bit too much of my own seam allowance so I had to let it out a bit under the arms. I fixed this easily since I had just basted the side hems. But make sure you pay attention to how much seam allowance you add and stay within that. I recommend adding 1/2 and inch and basting so you get the best fit. 
  • The pattern has minimal sewing directions, but if you've made one basic dolman then you can make this one even without pictures. There ARE pictures when you get to the collar portion to explain that part. 

Mandy Boat Tee by Tessuti Fabrics


  • This pattern is free! 
  • pattern is OS (max bust size is 58") and hand drawn
  • No layers due to OS
  • It features a 3/4 sleeve
  • there is no band on the neckline, this pattern has you turn under the neckline and stitch it down. This makes it SUPER fast. 
  • I used a silvery grey velour from walmart for this pattern. 
  • Fit is ok. I like the style of the body, but the sleeves were tight on me. I am unsure if this is due to my fabric choice or the pattern itself. I have just enough fabric to fix it I just haven't yet. Personally I'd add more seam allowance or sew on a smaller one to make them slightly larger, or just cut about 1/2 inch off the seam allowance for the width to give more room.
    The shirt itself is a very boxy fit and would be flattering on many body types. I actually gained weight and inches in my bust/hips/ and belly since making it and that part of the shirt all still fits and looks fine. 
  • directions include pictures and text. 

Hamburg Dolman by Shwin Designs


  • Pattern is NOT free
  • This pattern has no Layers and trim pages
  • I made a size M bust L hip
  • I used fabric upcycled from a knit bed sheet we had retired. 
  • My FAVORITE part about this shirt is it is both a dolman AND a raglan. Which can make from some fun color blocking. As such though it does use more fabric that the typical dolman to get the proper shape to the sleeves. 
  • Pattern has both a short and long sleeved option. (I made Long)
  • This pattern is very detailed about what all the sewing terms mean and included digitally drawn pictures as well to describe these terms. It also includes info on checking your fabrics for the required stretch. 
  • pattern includes pattern pieces for the neckband, optional banded hem, and the cuffs. 
  • Pattern has digitally drawn photos for the instructions. 
  • I felt like the fit and cut of this shirt is VERY flattering. I am not super tall, but am short waisted and long torso'd with an hourglass/pear shape. (depending on my measurements at the time.) I made this top last year and it still fits despite gaining weight and changing shape. 

Jalie 3354


  • This pattern has no layers
  • This pattern is not free
  • Pattern had long and Short sleeved options but long sleeves are not wrist length, rather 3/4 ish.
  • Sizes are letter based so I made a size S bodice and U hips. Personally I find this method of sizing obnoxious but Jalie runs from size 4- 22 so you get a LOT of bang for your buck. 
  • Pattern has lots of info on sewing and techniques as well. 
  • I used a green sweater knit from Knitpop and I can't recall if it's a hacci or something else. It has a feel similar to chenille but finer texture to the knit and the threads are not chunky. 
  • the pattern has info on hemming the neckline, or using a binding. I choose to do a band instead and used my own measurements for this. I also cut diagonally so the stripes run on an angle rather than straight across. ;) 
  • I added VERY long cuffs to mine as I do NOT like 3/4 sleeves. Be long or be short all ready! lol 
  • I'm ok with the fit of this shirt. I gained weight since making it and frankly I wasn't enamored with it before that either. I don't know if it's the fabric itself, or the cut but I just don't like how it hugs so much. It is soft and comfy so I will likely wear it still but not as frequently as other things I've made or that I've bought. 

In conclusion....


of this batch I think my favorite is a tie between the cloud 9(Did I mention I made 3 of those over the summer and fall?) and the Hamburg because I love the cut of the shirt and the raglan sleeve effect. They are both so different I don't think I could pick a favorite! So each of these will also be in my same fabrics lineup when I do a favorites comparison.

If you haven't read part one of this series check that out here>>> (this will open in a new window/tab)


Tuesday, August 21, 2018

Ian's Birth Story 3.5 years late!

Woke around 3:30 to use restroom. Notices contractions with a strong "burn" across the muscle. 

They continued after I returned to bed.

At around 4, I started timing the contractions and they are around 3-4 minutes apart but all lasting different lengths of time. Texted the midwife around 5, and doula around 5:30. Woke John up around that time. Midwife texted back around 6 that she was headed our way as did our doula.

John packed Norrie 's lunch and the rest of her bag and woke her up. Then occupied her in the living room till her ride came to pick her up. Around 7 everyone started arriving. Our doula, Mallory got there first, with the midwives arriving next, then Johns mom to pick up Norrie. I remember crying through some of the contractions, hanging on to Mallory, squeezing both her, and Johns hands and at one point ripping the towel bar off the wall mount in the bathroom.
After Norrie left they checked me and I was at a 7-8. I was shocked! Ian was in a funny position though sort of angled with his head in my hip. My midwife recommended a rotation. Basically you do 3 contractions on your side, belly, back, in downward dog position, and with legs spread a certain way, in an effort to get him into better position and help me get to 10. We did this for about an hour when I started feeling like I needed to push. Checked again and at a 9 with a slight lip.
I pushed a little in a side lying, and squatting position. Ian's heart rate would drop but then Come back up. Around 9 we realized that while it was coming back up it was still dropping and eventually wouldn't come back up. I was put on oxygen to help myself and Ian get better heart tones. The midwives called EMS for a transfer at around 10:55. I don't feel like I was quite pushing "right" at this point. The EMS workers where really nice but had no clue what was going on despite the midwives giving the dispatcher all kinds of info. All they knew was I was female and 28 years old. I walked from my bed to the stretcher which was agony, they strapped me in and carried me down my hallway and out the door. That's when I noticed our fire department had been dispatched as well.(not unusual as our fire depatment are first responders as well. But John had them stay back and let the midwives work and give me privacy.) They loaded me up and my midwife rode in the back straddling the stretcher. The EMS worker in the back handed her things and stayed up near my face. A few minutes later we were under way. My midwife broke my water and there was A LOT. Shortly after Ian was born in the ambulance at 11:25. He was totally fine. Pinked up fast, came out crying and his Apgars where 9 and 10. We pulled over so John could come in the back and see him. The ambulance had to take us to the hospital at that point due to liability issues but they agreed that we looked fine. We where checked into labor and delivery as an outpatient pair. The Ob on staff came and checked my bleeding and determined I had a small tear but no need for stitches. Basically they then said we could check out when we where ready. John rode with Mallory back to the house to get me shoes and clothes. When they got back we weighed little man while I got dressed and he was 8lbs 13oz!!! We left shortly after and were tucked into bed once back home.
We think Ian was hiding behind my public bone and that he was fine we just couldn't hear him. We also think that the "typical" birthing position may have been a big help in me getting him out as well as having my water broken. I pushed much better in this position and was able to feel what I was doing which made a huge difference!
All in all I am very happy with our delivery. I got skin to skin, nursed right away, a second unmedicated vaginal birth, and no separation from my baby. The most important things for me. And I wasn't to tired to do it which was my fear.


Saturday, November 4, 2017

Small Animal Couch DIY


One thing all small critters seem to enjoy is a soft squishy place to snuggle up.
My family is planning to adopt a trio of rats next month if all goes as planned.
Nice thing is I allready have experience using fleece with our guinea pig, and with cloth diapers, so the plan is lots of fleece and absorbency underneath.


One thing rats like is busy cluttered cages. so I've been making many things to stuff our cage with in preparation.
Today I made a cute little couch for the cage top. It may not last long but at least it will be something fun while it does last!
You will need:
  • fleece
  • Scissors
  • pins
  • a sewing machine
  • ribbon
  • stuffing or fabric scraps to stuff with
  • paper (to draw the pattern on)
  • ruler or yardstick
  • pen to write with
  • Lighter

 Draw your pattern on your paper.  I measured in CM as I found it a bit easier to get the measurements I wanted. 


:Lay your pattern on your fleece, pin and cut out. 
Cut two peices out. I have solid blue and striped blue. 


Cut 4 pieces of  gross grain ribbon about 5 inches in length(I tie tiny bows, if you want these can be longer). melt ends with a lighter. In an effort to not set myself on fire I didn't photograph that part of the steps. 
Lay the ribbon in the top corner of the piece, between the layers on fabric. 


Repeat at the top corners, and other back corners. Leave a small tail of ribbon peaking out of each corner.


All corners pinned ready to sew! 

use your sewing machine on a straight stitch at medium length. Make sure to use a woven, universal, or heavy duty needle to sew fleece properly.

Sew around your project edges at about 1/2 inch seam allowance. 


When you get to a corner You need to stop with your needle DOWN, and lift the presser foot, then turn your project. Before continuing. Leave a small opening unsewn for turning...


You can see where I started and stopped at the bottom slightly off center. 


Next a little pro sewing tip. Clip your seam allowance all the way around at about 1/2-2/3 in increments. Snip the fleece almost to the sewn lines. Do not cut THROUGH the sewn lines. 


Pro tip 2. Clip your corners that do NOT have the ribbon tails like so. This makes them easier to turn and get a nice point. 


Pro tip 3. Clip into your corner that dip. Just to the sewn line. Not through it. 


Not sure if you can tell in this photo but finished clipping my curves, corners, and seam allowance.


Turn right side out. 


Stuff just the arms and back with stuffing, leave the center un-stuffed for the moment. 


Sew across the back and sides trapping the stuffing in those arms and back. 


Finished sewing it will look like this. 


Tie your ends off close to your project then snip. No tails of thread for fur babies to choke on or get caught on toes!
Next stuff the center. (I apparently forgot to photograph this.


Tuck your raw edges in and using a hidden or ladder stitch close this opening up. 


Once that opening is closed tie your ribbons together into bows. This bring the couch back and arms up. To wash untie so it dries faster! 


Place in your cage. My ""Pillows" are scraps roughly 4 x 3 inches. I didn't bother to turn them right side out and left the edges raw. If you make yours slightly bigger you could snip around your seam allowance and make them fringed!
Make sure to tie off your tails and snip close to the project! 


To prevent redecorating, use a safety pin to fasten to your cage!

All done! 

Friday, September 29, 2017

Dolman Shirts Head to Head part 1


I've been loosing inches, and dropping sizes while eating on THM. As a result almost none of the clothing I sewed up last year is going to fit me properly this fall/winter.
While going through my patterns to decide what to make I realized I own 8 different dolman style top patterns. EIGHT. That's quite a few.

I'd really only sewn up 2, and thought in light of my clothing needs it would be a good opportunity to sew up a shirt form each pattern and compare patterns, fit, and such for the internet.

I'm going to be sewing up 7 of those patterns, some of which are free by joining facebook groups in order to get codes for thier shops. And I'm going to break this into two posts.

SOme of these were turned from long into shortsleeves by myself. I will denote this in the description. None of these patterns were given to me for this post. This is purely my opinions and based on my experiences.

I tried to use fabrics that had similar drape and thickness in hand. This was mostly successful. though a few will need to be remade in other fabrics to see if I REALLY like the fit as they turned out a bit differently than I thought they would due to fabric choices.

I took the most unflattering angles so you can see exactly how each top fits, A straight from the front, side view, arms straight out(to compare the "wings", and then a nicer photo.

So without further ado Dolman Shirts HEAD to HEAD pt 1.


First up is the HALA SLIM DOLMAN 


  • This pattern has layers and no trim pages. Which makes assembly pretty fast.
  • Measurements for cuffs and band are on the pattern. 
  • I used a sweater knit from my stash that I've had so long I have no idea the fabric content. But I think it's a cotton spandex blend.
  • I made this in a size 6 which was not graded. It's a bit snug in the belly. If I wanted a FABULOUS fit, I'd really need to do a full tummy adjustement or size up in the tummy and hips. I have a long torso, but my waist is really high. Just for refrence. This might have changed fit some if the fabric had a touch more drape or stretch.
  • The directions were clear and simple lots of tips for altering the pattern to have deeper "wings" or more slim ones, alter the neckline, etc. directions are photos and text based. 
  • I used my own neck band calculations for the neckline as I don't find that following the Suggested measurements results well for me.
  • I made the long sleeved version and cut to the longest length then added cuffs. as I typically do with any pattern as I get cold otherwise.


GRAINLINE HEMLOCK

  • This is a OS pattern so it is very loose and straight. It fits up to a 43.5 inch bust and 45 inch hip. as such there are no layers. This pattern will need trimmed to assemble. 
  •  I used a very drapey sweater knit for this one. It's practically see through and heavier than I thought. I want to make this one up in another fabric and see how I feel about it then.
  • Directions are line drawings and simple like any dolman construction. It's a bit trickier to add the sleeves and sew the side since I used a serger and due to the angles on the body and sleeve.
  • I used my own neckband calculations on this one as sweater knit drapes and stretches so much more differently than other fabrics with lots of spandex in them. 
  • This pattern has both a  long and short sleeved option. I used the long sleeved but did not add a cuff. I may go back and add one later as the sleeves are a bit shorter than I like. 


George and Ginger I Heart U

  • This is another free pattern in the george and Ginger facebook group. It's intended to be a pajama set and comes with a shorties pattern as well. It has no layers, And no trim pages, but is very well marked so that I had no trouble marking and tracing my size with ease. Even though I use a black and white printer. 
  • I used a rib knit from joanns for this one. It's drapey and comfy and will be perfect when fall weather finally hits. 
  • directions are clear line drawings and there are photos of finished garments as well. It's another with simple construction so I honestly just glanced over them. Once you've sewn a few dolmans you don't usually need directions for them. 
  • I used my own neckband calculations. and cut it the opposite direction of the stretch for an interesting detail. 
This pattern only comes in short sleeves. I drafted a new sleeve using the long sleeve part of the sweet tee from patterns for pirates, grading from the wrist to the width I needed to match the width of the sleeve opening.


Patterns for Pirates Sweet Tee

  • This pattern is NOT free. I made a size M with Large sleeves as her patterns tend to be snug fitting in the sleeves and I don't care for that. It's got layers, and no trim pages. 
  • I used a cotton lycra for the front of this top as well as the sleeves and cuffs/neckband. and a Jersey for the back. I had this one all ready cut out in this fabric and sitting waiting to be sewn up so I didn't move to another material. 
  • directions are step by step photos and text. So very easy to follow even for a beginner. I made almost only this pattern last summer and basically lived in it so I was all ready very familiar with the process though. 
  • I used my own neckband calculations. 
  • I sewed up the long sleeves version, cut to the longest length and then added cuffs again. 


Patterns for Pirates Pumpkin Spice Dolman

  • This pattern is NOT free. I made a size small, with Medium sleeves. I could have sized up a bit but this pattern tends to run large so I made a smaller size. In hindsight due to my material I wish I had sized up.  This has layers and No trim pages. 
  • I used an unknown fiber content sweater knit I got in a remnant bin from a warehouse sale for this one. I THINK it's a poly blend baby terry. but not sure. It's very hot for being so thin. 
  • Directions are step by step photos and text. Super easy for beginners to follow. 
  • I used my own neckband calculations. 
  • I sewed the long sleeved version of this pattern. Cut to longest length with cuffs added to that. 


In conclusion.....

I think my favorite after seeing photos is the sweet tee. With the grainline hemlock coming in second. I hope to sew up another of both of these and compare to my favorite of the next batch. The plan will be to sew all of those in the same fabric content to get the best comparison.

If you have any questions please leave them in the comments and I will answer as well as update the post with the information! 

Thursday, May 25, 2017

Fuel Pull Drinkable Yogurt THM FP

I've enjoyed eating the Trim Healthy Mama way for about 4 months now. I'm not a food blogger, and I'm more of a follower than a leader when it comes to cooking. But sometimes you read the I ingredients on something and think "I could make this!" And you just have to try.
Many of us in the Facebook group enjoy 000 yogurts while on this plan. It's a great grab and go snack, side or meal depending on how you eat it. I was o e of those many, until I realized I'm allergic to stevia! Now my fast and easy breakfast option. Is gone! As a busy mom on the go this is unacceptable.
So armed with some Ingredients I set to work. And I was successful! The best part is, you only need a few ingredients, and 3 measuring devices. Though once you've made this enough you could totally eyeball it and use no measuring stuff and then it's no mess at all to clean up.
It's a fuel pull, and taste is totally customize-able to what you like.


First Measure out a cup of fat free greek yogurt. Pour into your jar.
Next you need 3 tsp of swerve. (this is also a tablespoon but I never have those clean so use tsp instead.) Add that to your jar as well.  
next 1/2-3/4 cup of almond milk. depending on how runny you like your drinkable yogurt. 

Next I added lemon extract. 1 tsp of that. I also like raspberry extract so I've done both. 
Next add a lid and shake WELL! 
This is what it looks like, runny yogurt. 

Drink right away and enjoy, or store in the fridge for a busy morning. If using on another day shake well again before drinking!


print recipe

Drinkable Yogurt THM FP
I love drinkable yogurt, but with a stevia allergy I had to get creative. This recipe uses no special ingredients, and doesn't even get mixing bowls dirty!
Ingredients
  • 1 cup 0% fat greek yogurt
  • 1/2-3/4 cup Unsweetened Almond milk
  • 3 tsp Swerve or Eryrithritol sweetener
  • 1 tsp Raspberry or Lemon Extract (or both)
Instructions
Put all ingredients into an 8oz mason jelly jar.shake WELL!drink or store in fridge till ready to drink,* if refrigerating shake well before drinking,.Note: To make sweeter add more swerve or even stevia if not allergic. For different flavors you can try different extracts, or even fresh squeezed juice in small amounts.
I personally do not ingest essential oils or recommend it, but if you do that could change the flavor as well.
Details
Prep time: Cook time: Total time: Yield: 1 serving

Friday, May 19, 2017

Favorite Toys for our 2 year old daughter

Edited:
I wrote this post over 4 years ago but apparently never published it. So here it is! Late like I always am in Real Life...


As Sweetness just turned 2 It's time for me to make another Blog post about our favorite toys/non toys. Sweetness is really enjoying Playing pretend a lot, and is potty training as well. Both of which make toys and books so much more fun and interesting than before.  So Without further ado...


Favorite Toys:

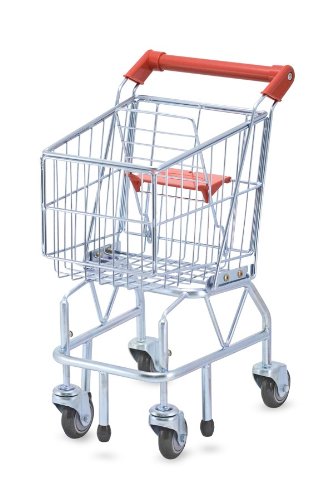
1.) Shopping cart- We have the metal Mellisa and Doug one and it gets played with daily. Her stuffed toys, babies, and random objects go for rides and get pushed around. When my little Sibs are over they love to make a "train" between the cart and the next toy and run laps around the kitchen table. If she could convince the cat I'm sure Ju-Ju would get pushed around too! lol 

2.) Stroller- Sweetness got an inexpensive doll stroller for christmas from her Grammy. I've made a new sling seat for it becasue she liked to sit in it and scoot it around and as such she wore it out. It also get's played with almost every day. And also get's pretty much everything to ride in it.

3.) The cat's teaser toy- We have one with a wire string and a furry "mouse" on the end of a wand. It was purchased at Petsmart and Her favorite thing is to daily run up and down the hallway with it and the cat following.


4.) Balls- small, big, soft, squishy, or bouncy. It doesn't matter. She loves them.


5.) Green Toys Build-a-Bouquet Floral Arrangement Playset- This was another Christmas gift and she loves it! I hate picking it up so the new rule is she has to clean it up before we get something else out. It's made from recycled plastic and is very easy to build and take apart since the piece just nest. Great for building flower towers then knocking down. 

6.) Lionel- Well he's actually the Cloud B Gentle Giraffe sound machine thing in travel size, but we call him Lionel. He's traveled with us to New york, NC, California, Georgia and all kinds of other random playdates and such. He is awesome. Getting a little matted and I have had to repair a hole in the neck once all ready. but we love him and need him every.single.night.

7.) Cloub B Turtle- She's just recently liked this. But it also must be on every.night.

8.) Pepper- She got Pepper For christmas. Our kitty who looked very much like her ran away and that kitty was also named pepper and Sweetness's buddy. I think that may have had something to do with the attachment. But nonetheless, I bought a second since pepper got carted around so much I was afraid she would get lost. Now we have Pepper and "Other Pepper".

9.) Baby doll- Doesn't matter what kind. She has 3. all different kinds. They all get mothered, carried around, taken to the potty, put to bed, and fed.

10.) A Phone/like object- Can be a toy or real if she can swipe it. Also random objects that are shaped like phones. Calculators, t.v. remotes, etc.

11.) Bead Maze- This is mostly used while sitting on the potty but she does that daily so it counts.


I've also included our few favorite books at the moment.


Books:
1.) Curious George and the Puppies- Got this a khols along with a stuffed George and I've read it at least twice a day.
But not the hippopatomus
Potty training books

DVDS:
Baby Signing Time
It's Potty Time